 Cooking Class")
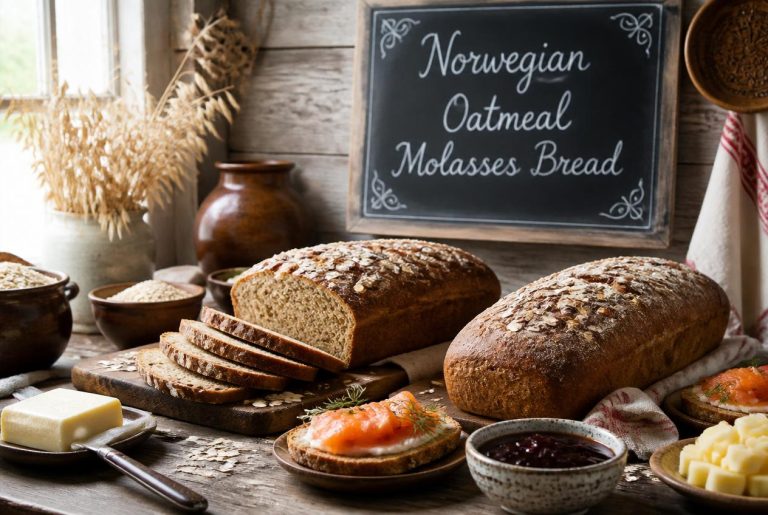
Norwegian Oatmeal Molasses Bread, or Havrebrød in Norwegian, is a hearty bread that mixes oats, molasses, and whole wheat flour into a loaf that’s just sweet enough for toast, sandwiches, or honestly, just eating straight out of the pan. This wholesome bread brings together oatmeal and molasses for a nutty flavor, a tender crumb, and a bit of sweetness that sneaks up on you. I’ve baked Norwegian Oatmeal Molasses Bread for years, and every single time, my kitchen fills with that smell—the kind that makes neighbors suddenly show up at the door with flimsy excuses.
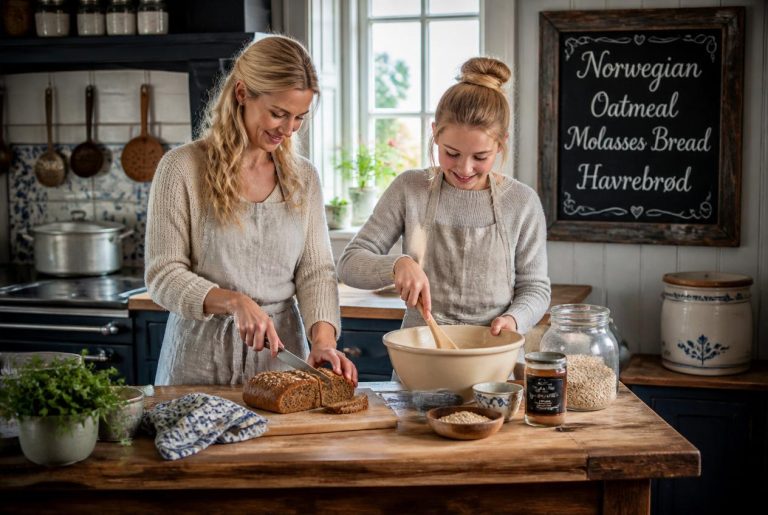
Honestly, what keeps me coming back to this recipe is how forgiving it is, even if you’re new to bread baking. The dough comes together without any drama, and you don’t need to channel your inner Viking to get it right. This bread is pure cold-weather comfort, especially slathered with butter, jam, or paired with a hearty stew when you’re in the mood to pretend you’re living in a snowy Norwegian cabin.
The beauty of Havrebrød is really in its simplicity. If you want a reliable sandwich bread or something special for breakfast, this slightly sweet, super tasty brown bread delivers every time. And you don’t have to give up your whole afternoon to make it happen—unless you want to, of course.
Norwegian Oatmeal Molasses Bread (Havrebrød)
Key Takeaways
- Norwegian Oatmeal Molasses Bread blends oats, molasses, and whole wheat flour for a nutritious, slightly sweet bread
- The recipe welcomes beginners—no advanced baking skills or complicated steps needed
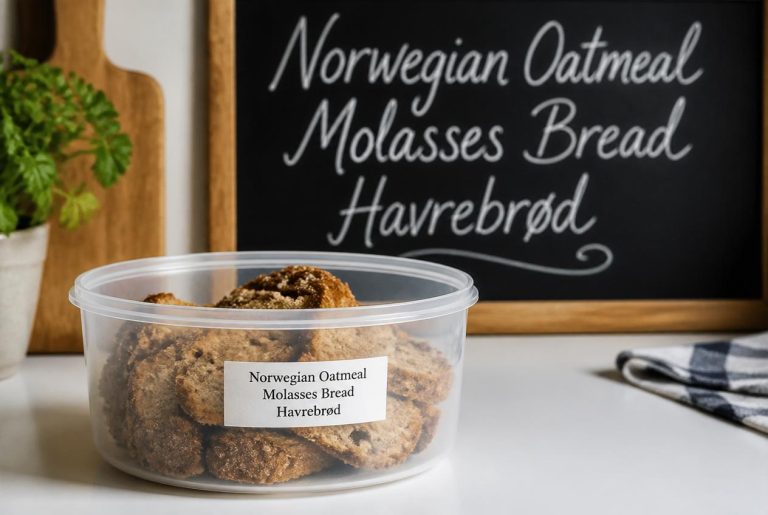
- You can customize Norwegian Oatmeal Molasses Bread with add-ins and keep it fresh for days with proper storage
The Epic Tale Of Norwegian Oatmeal Molasses Bread
Norwegian Oatmeal Molasses Bread comes from generations of Nordic bakers who blended hardy grains with a little unexpected sweetness. Molasses changed this humble bread into something a bit more special.
Ancient Grains And Even Older Vikings
I always wonder how Vikings managed those long sea voyages without Norwegian Oatmeal Molasses Bread to keep them going. Oats became Norway’s staple grain because they thrived in the cold, unlike wheat. These grains kept families fed through endless winters.
Norwegian baking traditions gave us more than just Norwegian Oatmeal Molasses Bread—think rice porridge and sour cream porridge. Still, oat bread was the daily staple. Families baked big loaves to last through the week, tucking them away in cool pantries.
This bread was practical and filling. It’s kind of funny how something so basic turned into a beloved classic. Oats were cheap and everywhere, so everyone—farmers, fishermen, you name it—could have Norwegian Oatmeal Molasses Bread on the table.
A Sweet Molasses Plot Twist
At some point, someone added molasses to oat bread, and Norwegian Oatmeal Molasses Bread got a serious upgrade. This recipe brings oats and molasses together in a way that just works. The dark syrup gives sweetness and moisture to the dense oat crumb.
Molasses made its way to Norway in the 1800s, thanks to trade. I love how this old-school loaf mixes tradition with a hint of something new. Molasses gives Norwegian Oatmeal Molasses Bread its deep brown color and that signature sweet taste.
The combo stuck around because it made sense. The bread stayed fresh longer and tasted better than plain oat loaves. Norwegian immigrants brought it to America, and now Norwegian Oatmeal Molasses Bread is a classic on both sides of the Atlantic.
Viking-Worthy Baking Tips
If you want the right texture in Norwegian Oatmeal Molasses Bread, start by softening your oats. I pour boiling water over them and wait until they’re cool before adding them to the dough. It takes patience, but trust me, your ancestors would nod in approval.
Kneading matters. I knead my dough for about 6-8 minutes, stopping when it feels smooth and elastic. Think of it as a free arm workout, minus the gym fees.
Here’s my flour trick—maybe not revolutionary, but it works:
- Mix half white flour and half whole wheat flour to avoid a loaf that could double as a doorstop
- Add flour bit by bit while kneading
- Stop when the dough is soft and only slightly sticky
I always oil my rising bowl with a bit of spray or oil. Wrestling with stuck dough is a bad time, and nobody wants that.
Temperature is sneakily important. I use warm water for the yeast—about 105-110°F, or what I’d call “nice bath” temperature. Too hot, you’ll kill the yeast. Too cold, the yeast just sits there, judging you.
After baking, I brush melted butter on my Norwegian Oatmeal Molasses Bread. It softens the crust and adds a shiny finish that makes the loaf look bakery-fancy.
For shaping, I punch out all the air after the first rise and shape the dough to fit my pans. No guessing, no lumps—just straightforward Norwegian Oatmeal Molasses Bread.

Norwegian Oatmeal Molasses Bread (Havrebrød)
Delightful Variations From Norwegian Grandmas
Norwegian grandmas treat their havrebrød recipes like family heirlooms, each convinced theirs is the true Norwegian Oatmeal Molasses Bread. Some sprinkle extra oats on top for crunch, others swear by the darkest molasses for flavor.
My favorite twist is swapping half the molasses for honey. It makes the bread lighter and a bit sweeter. I once met a grandma who tossed in sunflower seeds, and that nutty crunch stuck with me.
Grandma-Approved Variations:
- Use rye flour in place of some all-purpose for an earthier Norwegian Oatmeal Molasses Bread
- Add cardamom or cinnamon for warmth
- Brush tops with butter before baking
- Mix in dried cranberries or raisins
- Try buttermilk instead of regular milk
Plenty of Norwegian bakers don’t stop at Norwegian Oatmeal Molasses Bread. They’ll often whip up lefse, a potato flatbread, in the same afternoon. Totally different vibe, but just as beloved.
The potato flatbread tradition is strong in Norwegian kitchens—served with butter and sugar, or even savory fillings. Some grandmas make both, filling their homes with smells that honestly make you want to move in.
I’ve noticed that all these variations are simple and don’t need fancy ingredients. They’re just honest tweaks, shaped by each baker’s personality and what’s on hand.
And really, there’s no wrong way to make Norwegian Oatmeal Molasses Bread your own—just bake it with confidence, and make sure to share.
How To Stash Your Bread Like A Proper Scandinavian
If you want Norwegian Oatmeal Molasses Bread to stay fresh, you have to treat it right. After all that kneading and waiting, it deserves a little respect.
Room Temperature Storage
I usually wrap my cooled Norwegian Oatmeal Molasses Bread in a clean towel or put it in a paper bag. It lets the bread breathe and keeps the crust from getting rock-hard. Plastic bags? They just make the crust weirdly soggy, and I’ve learned that the hard way.
Norwegian Oatmeal Molasses Bread stays good at room temp for three or four days. I keep it in a cool, dry spot—definitely not in the sun.
Refrigerator vs. Counter Debate
I never put Norwegian Oatmeal Molasses Bread in the fridge. It dries out way faster in there. Seriously, the cold makes bread go stale quicker, which feels unfair but it’s true.
Freezer Friends Forever
For longer storage, I slice Norwegian Oatmeal Molasses Bread before freezing. I wrap slices or whole loaves in plastic wrap, then pop them in a freezer bag.
Frozen Norwegian Oatmeal Molasses Bread lasts up to three months. I just grab a slice and toast it straight from frozen—makes me feel like a breakfast genius on busy mornings.
If I want to thaw a whole loaf, I leave it wrapped on the counter for a few hours. Easy enough.
Norwegian Oatmeal Molasses Bread (Havrebrød) Cooking Tips
Norwegian Oatmeal Molasses Bread (Havrebrød)
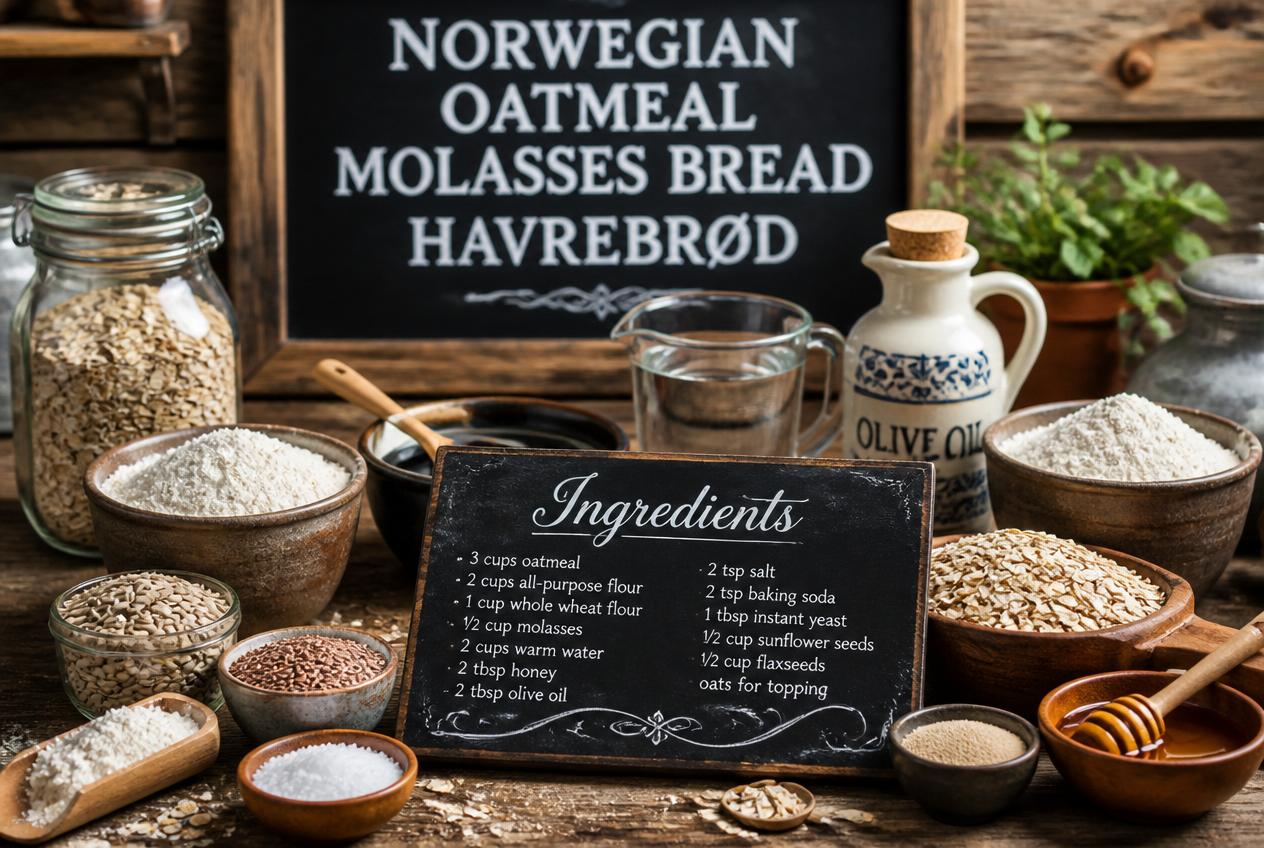
Ingredients
- 2 cups oat milk
- 2 cups water
- 2 1/4 teaspoons active dry yeast 1 packet
- 6 tablespoons maple syrup
- 4 cups whole wheat flour
- 4 cups all purpose flour unbleached
- 2 cups oats old fashioned
- 1 stick margarine melted (1/2 cup)
- 2 tablespoons sea salt to taste
- 1/2 cup flour
- 2 tablespoons water
- 2 tablespoons oatmeal
- 2 tablespoons oil
Instructions
- Begin by gently heating the water and oat milk until they reach approximately 98°F (37°C), which is comfortably warm but not hot. This temperature is ideal for activating the yeast without damaging it. Pour the warmed liquids into the bowl of a stand mixer. Sprinkle the yeast evenly over the surface, then add the maple syrup. Allow the mixture to sit undisturbed for 5–10 minutes. During this time, the yeast should begin feeding on the sugars and become foamy and bubbly. A visibly active mixture indicates that the yeast is alive and ready to help the dough rise properly.
- Fit the stand mixer with a dough hook attachment. With the mixer running on low speed, gradually add the remaining ingredients, saving the margarine for last. Adding the fat after the other ingredients have begun combining helps the dough develop better structure. Once all of the ingredients have been added, increase the speed to medium and knead the dough for 6–8 minutes.
- As the dough kneads, it should transform from rough and shaggy into a smoother, more cohesive mass. The dough may still feel slightly soft and tacky, but it should pull away from the sides of the bowl and hold together well. Proper kneading develops the gluten structure, which creates the soft texture and good rise in the finished bread.
- Leave the dough in the mixing bowl and cover it with a clean towel that has been dampened with warm water. The moisture helps prevent the surface of the dough from drying out while it rises. Place the bowl in a warm, draft-free area and allow the dough to rise until doubled in size, about 2 hours. During this time, the yeast will create air pockets throughout the dough, giving the bread a light and tender crumb.
- While the dough is nearing the end of its first rise, preheat the oven to 400°F (200°C). Lightly grease two large loaf pans with oil, making sure to coat the bottom and sides thoroughly. Properly prepared pans ensure the loaves release easily after baking and develop an even crust.
- Once the dough has doubled in size, transfer it to a clean work surface lightly dusted with flour. Gently press down on the dough to release the excess air without overworking it. Divide the dough evenly into two portions. Shape each portion into a rectangle roughly the same length as your loaf pans.
- Starting from one of the long sides, roll or fold the dough tightly toward the center, tucking the ends inward as you go to create tension on the surface of the loaf. This shaping technique helps the bread rise upward rather than outward during baking. Place each shaped loaf seam-side down into the prepared loaf pans.
- Cover the loaf pans loosely with a clean damp towel and allow the dough to rise again for about 30 minutes. During this second rise, the dough will become noticeably puffy and nearly double in size once more. This final proof helps create a lighter texture and gives the loaves their final shape before baking.
- Just before baking, lightly brush the tops of the loaves with water. The moisture helps the oats adhere to the surface and contributes to a beautiful finish. Sprinkle a generous layer of oats evenly across the tops of both loaves, pressing gently if necessary to help them stick.
- Place the loaf pans on the lower rack of the preheated oven and bake for 40–50 minutes. As the bread bakes, the tops will develop a rich golden-brown color and the kitchen will fill with the aroma of freshly baked oats and yeast. The loaves are done when they sound hollow when tapped on the bottom or top and have a firm, well-browned crust. If you have an instant-read thermometer, the internal temperature should register approximately 190–200°F (88–93°C).
- Remove the loaves from the oven and allow them to rest in their pans for a few minutes before carefully turning them out onto a wire cooling rack. Let the bread cool completely before slicing. Although it may be tempting to cut into a warm loaf, allowing it to cool fully gives the crumb time to set and prevents the interior from becoming gummy. Once cooled, slice and enjoy with butter, jam, sandwiches, or your favorite toppings. The bread also freezes beautifully for longer storage.
Norwegian Oatmeal Molasses Bread Frequently Asked Questions
Norwegian Oatmeal Molasses Bread gets a lot of questions—mostly about its molasses flavor, ingredient swaps, texture issues, and whether it’s really Norwegian. People also ask about storage and if you can skip the yeast (spoiler: you really shouldn’t).
Why does this bread taste like breakfast decided to wear a sweater and get serious?
The molasses gives Norwegian Oatmeal Molasses Bread a deep, grown-up sweetness—way more interesting than your average toast. Oats add a hearty, nutty base that makes each bite feel substantial.
I think of Norwegian Oatmeal Molasses Bread as comfort food that’s actually got its act together. The oats and molasses combo brings a flavor that’s filling but never dull.
Can I swap the molasses for honey, or will the bread file a formal complaint?
Honey works in Norwegian Oatmeal Molasses Bread, though it makes the loaf lighter and less complex. Molasses is what gives havrebrød its signature color and deep flavor—honey just can’t quite do the same thing.
I’ve tried both. Honey makes a nice loaf, but you’ll miss that almost-caramel quality molasses brings. The bread won’t actually complain, but it might give you a look.
How do I keep the loaf from turning into a brick with excellent manners?
Adding too much flour is usually what makes Norwegian Oatmeal Molasses Bread dense. Add flour slowly until you get a soft, slightly sticky dough.
Overkneading can also toughen up the bread. I knead for about 10 minutes, just until it’s smooth, then stop. No need to go overboard.
And always check that your yeast is fresh and happy. Dead yeast means no rise, and no rise means you’ve made a polite, but very unhelpful, doorstop.
Is this the kind of bread Norwegians actually eat for breakfast, or is that marketing sorcery?
Norwegians really do love their bread, and plenty of families bake loaves like Norwegian Oatmeal Molasses Bread at home all the time. Havrebrød isn’t some tourist gimmick—it’s the real deal, a traditional bread with deep roots.
Honestly, folks in Scandinavia seem to bake their own bread more than almost anyone else. Norwegian Oatmeal Molasses Bread feels like it belongs on every breakfast table up there.
People usually serve Norwegian Oatmeal Molasses Bread with butter, cheese, or that wild Norwegian brown cheese. That sweet, tangy cheese actually works shockingly well with the bread’s gentle sweetness. I didn’t believe it at first, either.
Can I make it as a quick bread, or does it demand the full yeast-and-patience experience?
You’ll need yeast and some patience to nail Norwegian Oatmeal Molasses Bread. Sure, you can find quick bread recipes, but they just won’t deliver the same chewy, satisfying crumb. You’ll miss out on that classic texture.
Letting dough rise can feel like a test of your willpower (or your schedule), but the yeast is what gives Norwegian Oatmeal Molasses Bread its lift and structure. Without it, you end up with something dense and kind of sad—definitely not what you’re after.
Set aside at least two hours from start to finish, including rising time. Norwegian Oatmeal Molasses Bread is absolutely worth the wait, even if you’re a little impatient like me. Once you smell it baking, you’ll be glad you stuck it out.
What’s the best way to store it so it stays cozy and moist instead of going stale and dramatic?
Wrap your Norwegian Oatmeal Molasses Bread in plastic wrap once it cools, or stash it in an airtight container at room temp. That usually keeps it fresh and soft for three to four days—pretty solid for homemade bread, honestly.
Personally, I like to slice Norwegian Oatmeal Molasses Bread before freezing and tuck individual pieces into freezer bags. That way, I can just grab a slice or two when the craving hits, no need to thaw the whole loaf and risk it drying out.
The oats in Norwegian Oatmeal Molasses Bread really help lock in moisture, so it doesn’t dry out as fast as plain white bread. Whatever you do, skip the fridge—it makes the texture go weirdly tough and takes away that cozy vibe. If you care about your Norwegian Oatmeal Molasses Bread (and why wouldn’t you?), room temp is the way to go. Norwegian Oatmeal Molasses Bread just doesn’t belong in the fridge.

Recipes are gathered in person and written for real-world cooking conditions.
- 10 Hungarian Dessert Recipes Passed Down Through Generations - July 25, 2026
- 11 Easy English Recipes Anyone Can Make - July 25, 2026
- Hungarian Kifli Recipe - July 25, 2026