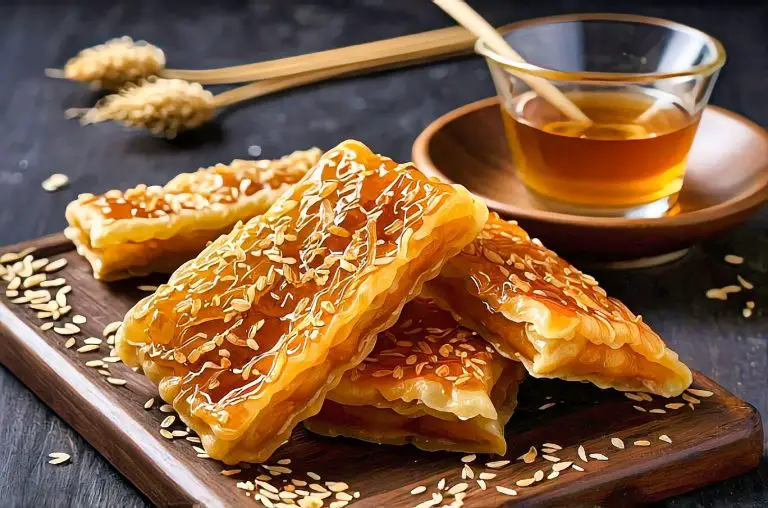
Chinese Sachima recipe is a sweet treat for sweet snack lovers. I like the fluffy texture and caramelised sweetness. Simple but effective methods highlight the natural flavors of ingredients in this treat.
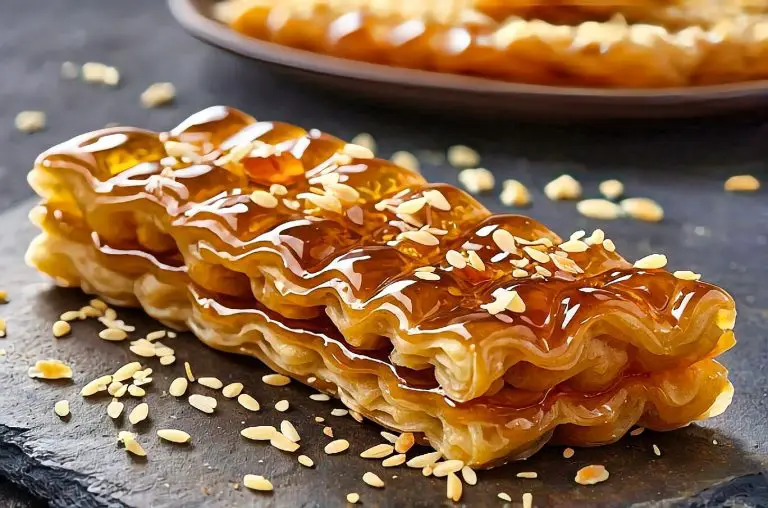
I discover the various levels of taste that the Chinese Sachima recipe is offering and this particular dessert is so easy yet so tasty. Unlike a number of other complex sweets, its preparation has a simple charm. Its appeal is the light and sticky consistency which makes Sachima a snack or dessert.
I love just how adaptable this particular recipe is! Part of the secret of making the Chinese Sachima a favorite is personalizing the recipe. Each time I attempt and make it I learn new nuance in the sugary delight. This enables me to make a customized confectionery delight.
Exploring Chinese Sachima Recipe.
The Chinese Sachima recipe is mainly sweet and distinctive in texture. The process involves combining ingredients for a delicious treat. The taste profile might be changed to produce various tastes.
Complexity of Procedure.
Making the Chinese Sachima recipe calls for many steps. The basic preparation is simply flour and eggs – after which a dough is fried till golden. After that a sticky syrup is made – usually with maltose and sugar – that spreads the sweetness throughout the snack.
Attention to detail is vital. The syrup is poured over the fried dough pieces and blended very well but gently to hold shape. The consistency and texture must be patiently achieved. Sachima needs to be precisely crafted despite its simple appearance. Each stage must be carefully performed to obtain the desired texture and flavor.
Flavor Variations.
The Chinese Sachima recipe could be adapted to any palate. Add additional ingredients like sesame seeds or nut shells to create various flavorings. The traditional sweetness might be paired with subtle spice or salt.
Changes in the syrup composition like substituting honey instead of sugars may also vary the flavor. Variations in texture may be created by experimenting with dough thickness. These modifications make the Sachima more versatile to suit a broader range of tastes. The options for customization turn it into a favorite for people searching for a familiar snack with a twist.
Nutritional Profile.
The nutritional profile of Sachima must include carbohydrates. It is made primarily from the flour and sugar used and gives a quick energy hit. This will make the Chinese Sachima recipe a favorite snack but should be eaten in moderation because of the higher sugar content.
Fats are present in the Sachima because it contains butter or oil. These fats produce a satisfying taste but also raise the calorie count; portion size must be an issue.
The eggs in the batter in the Chinese Sachima recipe provide some protein content. It isn’t a big protein source, but is a great addition for all those looking for a little bit more balanced treat.
There are few vitamins and minerals. The recipe lacks high-vitamin and mineral ingredients. However, homemade variations might add nuts or seeds, which might modify the nutrient profile slightly.
Sugar is a primary ingredient, giving Sachima the sweet taste she’s famous for. It appeals to sweet tooth lovers but can cause problems with sugar absorption if taken frequently.
The caloric content of Sachima might be high. This is helpful for all those monitoring their caloric intake or even searching for a healthy diet.
Finally, my attention on the nutrition of the Sachima – its scrumptious flavor but also its need for careful consumption – considering its high sugar and fat content.
Ingredients For the Chinese Sachima Recipe
Dough
Flour
Baking Powder
Salt
Eggs
Tapioca
Add Ons
White Sesame Seeds
Pumpkin Seeds
Walnuts
Syrup
Water
Sugar
Maltose
Cooking Instructions For the Chinese Sachima Recipe
Add Ons
On a dry pan, toast the nuts, pumpkin seeds, and sesame seeds for approximately five minutes, or until fragrant. Mix them together and put them aside while you get other things ready. Use parchment paper to line your square cake pan. Get another big piece of parchment paper ready.
Dough
In a large mixing basin, combine the flour, baking powder, and salt. Mix with a whisk. Add the beaten egg and mix until the dough becomes rather sticky. Cover and leave for half an hour.
After half an hour, sprinkle some tapioca starch over your palms and your work surface. Now that the dough is smooth and non-sticky, kneading should be simpler.
Split the dough in half. Keep the other covered while working on one at a time. The dough should be rolled to a thickness of 1/8 inch (3 mm). Slice into three pieces, then arrange them in a stack. Slice the noodles into strips that are 1/4 inch (5 mm) wide using a sharp knife. To keep them from sticking, toss them with some tapioca starch. Continue with the remaining dough.
Baking
Warm up the oil. The oil is ready when bubbles form around a skewer or chopstick after it has been dipped. Reduce the heat to medium and give it a minute or so. In batches, fry the strips of dough until they are puffed and float to the top, about 3–5 seconds. Don’t cook them too much. They ought to have a hint of golden brown. Continue with the remaining strips of dough. While you make the syrup, keep them warm in the oven.
Syrup
In a big wok or large deep heavy-bottom pot, combine all the ingredients for the syrup. Cook for approximately ten minutes over low to medium heat, or until the mixture is frothy and foamy.
Water Test
Carefully scoop a tiny bit of the melted sugar into a small cup of water, then drop it into the water to form a ball. It feels mushy and won’t keep its shape if you wait a few seconds before picking it up with your hand. A candy thermometer should read between 235 and 240 F (112 and 116 C). Switch off the heat.
Assemble
Add the fried dough strips and the seed mixture at away, stirring to ensure the dough mixture is coated with the sticky syrup. Transfer right away to the prepared pan, using a spatula to spread them out as much as possible. Then, place a piece of parchment paper on top and press them down to pack them down evenly.
After allowing it to cool, cut it into squares of any size. They can be stored for weeks if you keep them in an airtight container.

FAQ For the Chinese Sachima Recipe
Question: What is the main ingredient in a Chinese Sachima Recipe Recipe?
A: The main ingredient in a Chinese Sachima Recipe Recipe is fried dough strands, which are made from flour, eggs, and sugar, combined with a syrup to bind them.
Question: How is the syrup prepared for a Chinese Sachima Recipe Recipe?
A: The syrup in a Chinese Sachima Recipe Recipe is typically made by boiling sugar, maltose, and water until it reaches a sticky consistency that holds the dough strands together.
Question: Can I add nuts or dried fruits to a Chinese Sachima Recipe Recipe?
A: Yes, nuts like peanuts or almonds and dried fruits like raisins can be added to a Chinese Sachima Recipe Recipe to enhance its flavour and texture.
Question: How do I ensure the dough strands in a Chinese Sachima Recipe Recipe remain crispy?
A: To keep the dough strands crispy in a Chinese Sachima Recipe Recipe, ensure they are fried at the correct temperature and cooled completely before combining with the syrup.
Question: How should a Chinese Sachima Recipe Recipe be stored?
A: A Chinese Sachima Recipe Recipe should be stored in an airtight container at room temperature to maintain its texture and freshness for up to a week.

Best Chinese Sachima Recipe
Ingredients
- 2 1/2 cups Flour bread
- 1 tsp Baking Powder
- ½ tsp Salt
- 4 large Eggs Beaten
- 1 tsp Tapioca starch for dusting
- 1/4 cup White Sesame Seeds toasted
- 1/4 cup Pumpkin Seeds toasted
- 1/2 cup Walnuts roughly chopped
- 10 tbsp Water
- 1 cup Sugar plus 5 tbsp
- 3 Tbsp Maltose you can use honey if you can find maltose
Instructions
- On a dry pan, toast the nuts, pumpkin seeds, and sesame seeds for approximately five minutes, or until fragrant. Mix them together and put them aside while you get other things ready. Use parchment paper to line your square cake pan. Get another big piece of parchment paper ready.
- In a large mixing basin, combine the flour, baking powder, and salt. Mix with a whisk. Add the beaten egg and mix until the dough becomes rather sticky. Cover and leave for half an hour.
- After half an hour, sprinkle some tapioca starch over your palms and your work surface. Now that the dough is smooth and non-sticky, kneading should be simpler.
- Split the dough in half. Keep the other covered while working on one at a time. The dough should be rolled to a thickness of 1/8 inch (3 mm). Slice into three pieces, then arrange them in a stack. Slice the noodles into strips that are 1/4 inch (5 mm) wide using a sharp knife. To keep them from sticking, toss them with some tapioca starch. Continue with the remaining dough.
- Warm up the oil. The oil is ready when bubbles form around a skewer or chopstick after it has been dipped. Reduce the heat to medium and give it a minute or so. In batches, fry the strips of dough until they are puffed and float to the top, about 3–5 seconds. Don't cook them too much. They ought to have a hint of golden brown. Continue with the remaining strips of dough. While you make the syrup, keep them warm in the oven.
- In a big wok or large deep heavy-bottom pot, combine all the ingredients for the syrup. Cook for approximately ten minutes over low to medium heat, or until the mixture is frothy and foamy.
- Carefully scoop a tiny bit of the melted sugar into a small cup of water, then drop it into the water to form a ball. It feels mushy and won't keep its shape if you wait a few seconds before picking it up with your hand. A candy thermometer should read between 235 and 240 F (112 and 116 C). Switch off the heat.
- Add the fried dough strips and the seed mixture at away, stirring to ensure the dough mixture is coated with the sticky syrup. Transfer right away to the prepared pan, using a spatula to spread them out as much as possible. Then, place a piece of parchment paper on top and press them down to pack them down evenly.
- After allowing it to cool, cut it into squares of any size. They can be stored for weeks if you keep them in an airtight container.

3 comments
Super sweet delicious dessert. Make it now and again for the grandkids and they always want it when they visit.
I think the complexity of the procedure adds to the satisfaction of making the best Chinese Sachima. Its like a culinary challenge that makes the end result even more rewarding!
I think the complexity of the Chinese Sachima recipe is what makes it so exciting to try out! Its like a culinary adventure in your own kitchen. Whos up for the challenge?