
This Italian Tiramisu Cheesecake recipe brings together a mascarpone-cheesecake filling and layers of espresso-soaked ladyfingers, so every slice packs that coffee-forward depth and cheesecake silkiness that’s just hard to resist.
When you follow this Italian Tiramisu Cheesecake recipe, you’ll pick up practical tips for nailing the crust, keeping cracks at bay, and balancing the coffee so it’s not too strong or sweet. You’ll also stumble across a few fun history tidbits and some expert advice to help you get the most out of this dessert. Honestly, it’s a treat for both beginners and seasoned bakers.
History and Development
Let’s be real, tiramisu and cheesecake started out in totally different worlds before they met in the Italian Tiramisu Cheesecake recipe. Tiramisu came from Italy, all about layers of coffee, mascarpone, and ladyfingers—a true Italian classic, though the exact birthplace is still up for debate. Meanwhile, New York–style cheesecake traces its roots to Europe but really found its signature dense, cream cheese texture in the US.
People started playing around with coffee desserts and cream cheese, and that’s how the Italian Tiramisu Cheesecake recipe was born. Chefs and home bakers took what’s best about tiramisu—espresso, mascarpone, cocoa—and mixed it with the sturdy, rich feel of a cheesecake. That’s how you get a dessert that keeps tiramisu’s bold coffee vibe but holds together like a proper cake.
Most Italian Tiramisu Cheesecake recipe variations go one of two ways: some layer coffee-soaked ladyfingers into or on top of the cheesecake, while others swirl coffee-flavored mascarpone right into the cream cheese filling. Either way, you’re getting the heart of tiramisu and New York cheesecake in every bite. Isn’t that what dessert dreams are made of?
It’s kind of wild how this mashup mirrors global food trends. You can trace the Italian Tiramisu Cheesecake recipe to the rise of fusion desserts, better access to specialty ingredients, and just people wanting to remix old favorites. If you love tiramisu and cheesecake, honestly, why not have both in one?
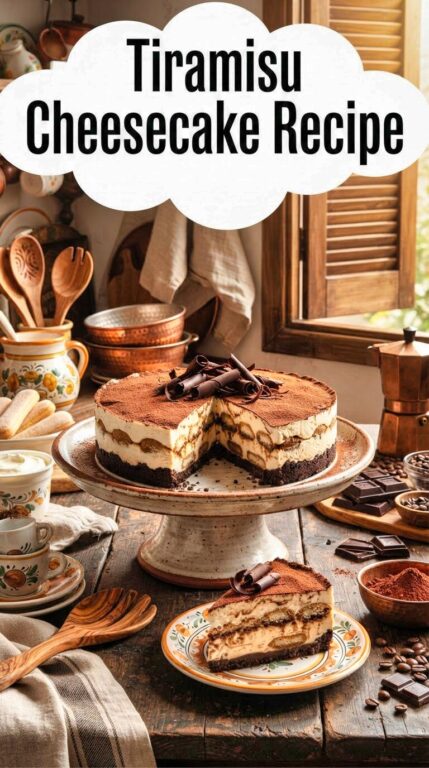
Preparation Techniques
First things first: decide if you want a baked or no-bake Italian Tiramisu Cheesecake recipe. For baked, preheat your oven and grab a springform pan. For no-bake, just chill your pan in the fridge and get your ingredients ready. It’s all about what you’re in the mood for.
To make the base for this Italian Tiramisu Cheesecake recipe, beat room-temperature cream cheese, mascarpone, and powdered sugar until smooth. Splash in some vanilla and maybe a little heavy cream if it feels too stiff. You want a creamy, stable filling that’ll slice nicely but still feel light.
Now, move on to the crust and ladyfingers. Crush some biscuits for a buttery base, or line your pan with lightly toasted ladyfingers for extra structure. If you’re layering ladyfingers inside the cake, dip them quickly in strong coffee or a little Kahlúa. Don’t let them soak too long—they’ll get mushy and ruin the texture of your Italian Tiramisu Cheesecake recipe.
For the baked Italian Tiramisu Cheesecake recipe, gently fold your mascarpone and cream cheese mixture so you don’t overwork it. Use a water bath if you can—it’ll help keep things smooth and crack-free. If you’re making a no-bake version, whip heavy cream to soft peaks and fold it in for a mousse-like finish. It’s a little extra effort, but it pays off.
Last step for your Italian Tiramisu Cheesecake recipe: finish strong with a dusting of cocoa or maybe a bit of instant espresso powder. Chill the no-bake version for at least four hours, or let your baked cheesecake cool slowly in the oven with the door cracked before popping it in the fridge overnight. The wait is tough, but the payoff? Totally worth it.
Expert Cooking Advice
If you want the best results for your Italian Tiramisu Cheesecake recipe, grab a 9-inch springform pan. It really helps with even baking and gives you those clean, sharp edges. I usually grease the sides just a bit and put parchment on the bottom—makes unmolding way less stressful.
When you’re mixing cream cheese and mascarpone for your Italian Tiramisu Cheesecake recipe, stop as soon as it looks smooth. Overmixing? Trust me, it just brings in too much air and you’ll end up with cracks. Gently fold in whipped cream or egg whites so the filling stays velvety and dense.
Baking your Italian Tiramisu Cheesecake recipe? Go with a water bath. It keeps the oven temp steady and helps prevent cracks. I always wrap the pan base in foil to keep water out, then bake until the center still jiggles a bit—it’ll finish setting as it cools.
If you’re making a no-bake Italian Tiramisu Cheesecake recipe, chill it for at least 6–8 hours, though overnight is honestly better. That extra time lets the mascarpone filling firm up, so you’ll get cleaner slices when you pull it from the fridge.
For the Italian Tiramisu Cheesecake recipe, soak your ladyfingers or brush sponge cake with cooled espresso, but don’t overdo it. If they get too soggy, the crust falls apart and slicing turns into a mess. Less is more here.
I like to finish an Italian Tiramisu Cheesecake recipe with a dusting of cocoa powder right before serving. That way, it looks fresh and gorgeous. If you need to keep it for more than two days, just drape some plastic wrap over the top and stash it in the coldest spot in your fridge.
If your Italian Tiramisu Cheesecake recipe starts to separate or weep a little, just chill it and don’t try to rewhip the filling. A gentle chill and some patience usually bring the texture back, and the flavor stays spot on.
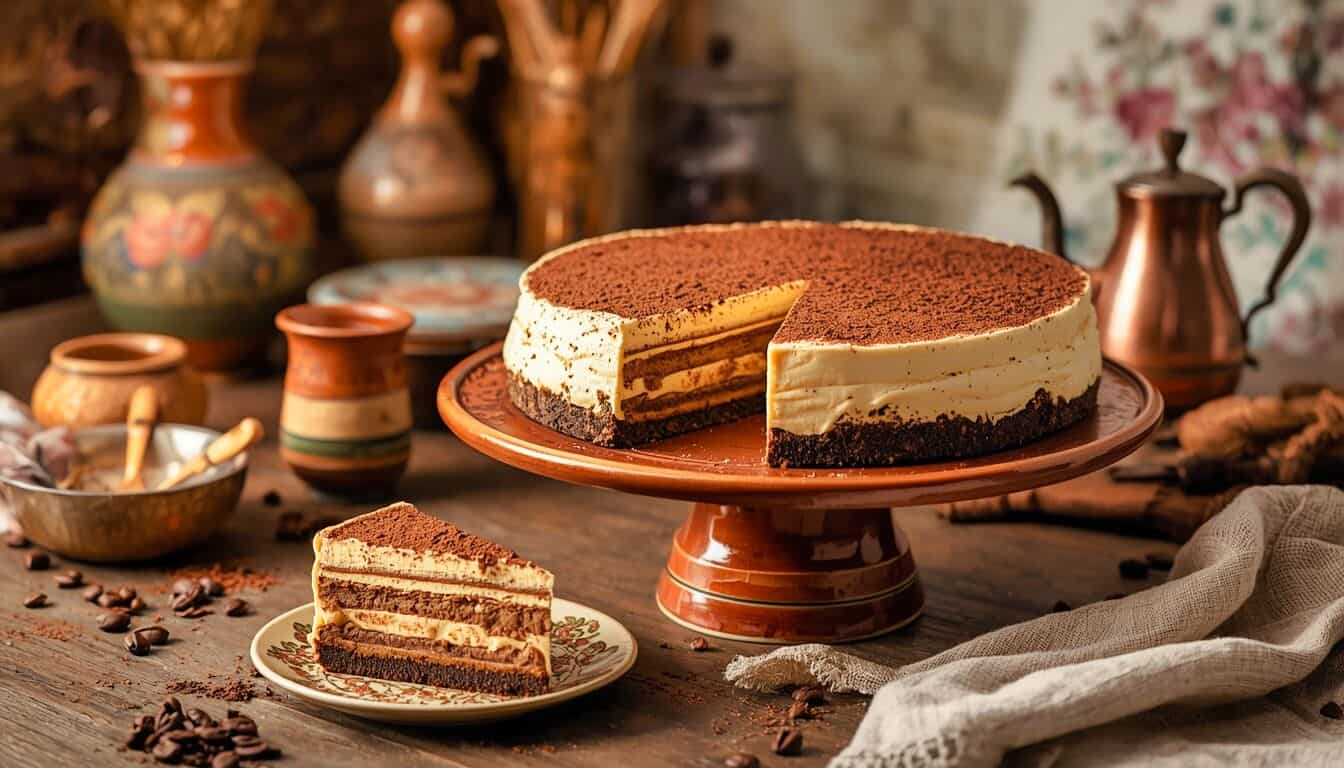
Tiramisu Cheesecake Recipe
Ingredients
- 1 ⅓ cups graham crackers or digestive biscuit crumbs
- 2 tablespoon light brown sugar packed
- 2 teaspoon cocoa powder I prefer this Dutch cocoa or this one
- 4 tablespoon butter unsalted melted and cooled
- 20 oz brick cream cheese softened
- ¾ cup granulated sugar
- 2 large eggs at room temperature
- 1 large egg yolk
- ⅔ cup sour cream full fat
- 1 teaspoon vanilla extract
- 1 ½ cups Cheesecake Base
- 1 to 1 ½ tablespoon espresso powder dissolved in 2 teaspoon 10ml hot water
- ¼ cup espresso freshly brewed hot or dissolve 1 tablespoon espresso powder in 60ml hot water
- 15 arrowroot biscuits
- 1 cup whipping cream 35%
- 1 teaspoon granulated sugar
- 2 tablespoon sour cream full fat
- ½ teaspoon vanilla extract pure
- 2 tablespoon cocoa powder for dusting
Instructions
- Preheat the oven to 350°F.
- Cut a round piece of parchment paper to fit the bottom of an 8-inch nonstick springform pan.
- Place the parchment inside the pan.
- Wrap the outside bottom of the springform pan securely with 2 large sheets of aluminum foil.
- Make sure the base is completely protected so water cannot seep into the pan during baking.
- Prepare the Graham Cracker Crumbs
- Place the graham crackers and sugar in a food processor.
- Pulse until the crackers become fine crumbs.
- Pour in the melted butter and pulse again until evenly combined.
- If a food processor is not available, place the graham crackers in a resealable bag.
- Crush them finely with a rolling pin or the bottom of a heavy pot.
- Transfer the crumbs to a bowl.
- Stir in the sugar and melted butter until evenly moistened.
- Pour the crumb mixture into the prepared springform pan.
- Press it firmly and evenly across the bottom.
- Continue pressing the mixture approximately 1 inch up the sides of the pan.
- Place the pan in the preheated oven.
- Bake for 8 to 10 minutes.
- The crust should become lightly golden and feel dry to the touch.
- Prepare for the Water Bath
- Reduce the oven temperature to 300°F.
- Bring a kettle of water to a boil and keep it ready for baking the cheesecake.
- Begin the Cheesecake Filling
- Place the softened cream cheese in a large bowl.
- Using an electric hand mixer on medium speed, beat until completely smooth.
- Continue mixing for approximately 30 to 45 seconds, or until the mixture becomes smooth and creamy.
- Avoid beating longer than necessary, as too much air can create bubbles that may cause the cheesecake to crack.
- Add the whole eggs one at a time.
- Mix thoroughly after each addition.
- Make sure the batter is smooth before adding the next egg.
- Add the egg yolk and mix until incorporated.
- Stir in the sour cream and vanilla.
- Scrape the sides and bottom of the bowl whenever necessary.
- Continue until the cheesecake batter is completely smooth and free of lumps.
- Measure 1 1/2 cups of the plain cheesecake batter into a separate clean bowl.
- Combine the espresso powder and hot water.
- Stir until the espresso powder has completely dissolved.
- Pour the espresso mixture into the reserved cheesecake batter.
- Stir until the coffee flavor is evenly distributed.
- Pour approximately half of the plain cheesecake batter over the pre-baked crust.
- Spread it into an even layer.
- Pop any visible air bubbles on the surface.
- Gently spoon half of the espresso cheesecake mixture over the plain batter.
- Using a small spoon, lightly swirl the two mixtures together.
- Avoid excessive swirling, which can cause the colors to blend completely.
- Keep the spoon near the surface so the crust is not disturbed.
- Dip each biscuit into the hot espresso, coating both sides and allowing it to soak thoroughly.
- Arrange the soaked biscuits in an even layer over the cheesecake batter.
- Overlap the biscuits slightly or break some into smaller pieces as needed to completely cover the surface.
- Pour half of the remaining coffee batter over the biscuit layer.
- Spoon the remaining plain cheesecake mixture over the top.
- Drop spoonfuls of the final coffee batter across the surface.
- Gently swirl the mixtures together without overmixing.
- Place the springform pan inside a large rimmed baking tray.
- Carefully transfer both pans to the oven.
- Pour boiling water into the outer baking tray until it reaches approximately 1/2 inch up the sides of the springform pan.
- Bake for 35 to 40 minutes.
- The edges should appear set while the center remains very wobbly.
- Complete the Baking Process
- Leave the cheesecake inside for another 10 to 15 minutes.
- Do not open the oven door during this time, as the sudden loss of heat may affect the cheesecake.
- The cheesecake is ready when the filling is set but the center still has a slight jiggle when the pan is gently moved.
- Carefully transfer the springform pan to a wire rack.
- Immediately run a knife around the inside edge of the pan.
- This loosens the cheesecake from the sides and reduces tension as it cools.
- Leave the cheesecake in the pan until completely cooled.
- Once the cheesecake reaches room temperature, transfer it to the refrigerator.
- Chill for at least 2 hours or overnight.
- Place the heavy whipping cream and sugar in a medium bowl.
- Using an electric hand mixer on medium speed, beat until soft peaks form.
- The cream may also be whisked by hand.
- Add the vanilla and sour cream.
- Beat for only a few additional seconds.
- Continue until the mixture forms slightly firmer peaks without becoming stiff.
- Transfer the cream mixture to a piping bag.
- Pipe dollops over the chilled cheesecake in concentric circles.
- After completing each ring, use the back of a small spoon to gently smear the inward-facing side of each dollop.
- Continue with the next ring until the surface is decorated.
- Dust the top generously with cocoa powder.
- Slice and serve the cheesecake chilled.
- This Tiramisu Cheesecake combines a crisp graham cracker crust with layers of creamy vanilla and espresso cheesecake, coffee-soaked biscuits, and delicate coffee swirls. Finished with a light sour cream whipped topping and a generous dusting of cocoa powder, it's a rich and elegant dessert inspired by classic Italian tiramisu.

Recipes are gathered in person and written for real-world cooking conditions.
- 10 Hungarian Dessert Recipes Passed Down Through Generations - July 25, 2026
- 11 Easy English Recipes Anyone Can Make - July 25, 2026
- Hungarian Kifli Recipe - July 25, 2026