
Honestly, the Lee’s Sponge recipe just hits differently—light, quick, and somehow less intimidating than most sponge cakes out there. Even if you’ve never tried baking a sponge, you’ll probably pull this off. I’ll walk you through the process, share those tiny tricks that make a difference, and point out where you can improvise without risking a kitchen disaster. This is a genuinely reliable, feather-light Lee’s Sponge recipe with just a handful of ingredients and no fancy steps.
Let’s get into what makes Lee’s Sponge recipe special, the pitfalls you should dodge, and a few easy swaps to keep it fresh each time. I’ll keep it real and practical—baking should feel chill, not stressful.
Lee’s Sponge Recipe
Key Takeaways
- Lee’s Sponge recipe uses just a few ingredients for a classic, fluffy cake.
- Little technique tweaks keep Lee’s Sponge recipe light and pretty much foolproof.
- You can easily riff on Lee’s Sponge recipe with new flavors or store leftovers with zero stress.
English Recipe Description and Historical Information
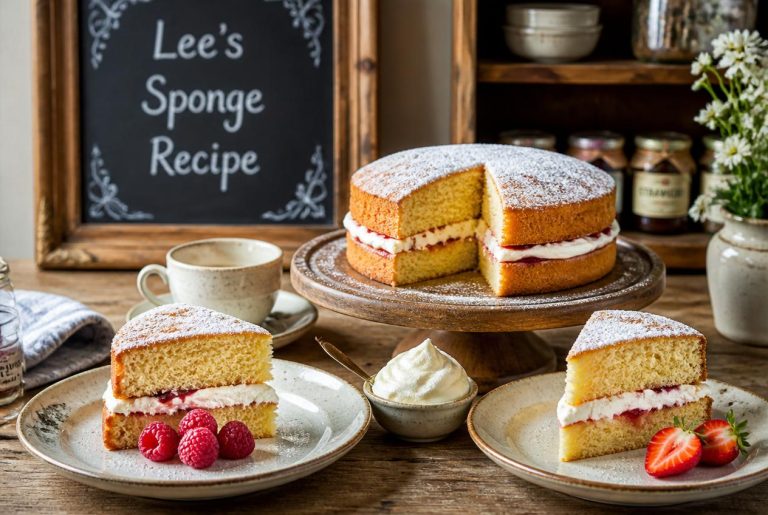
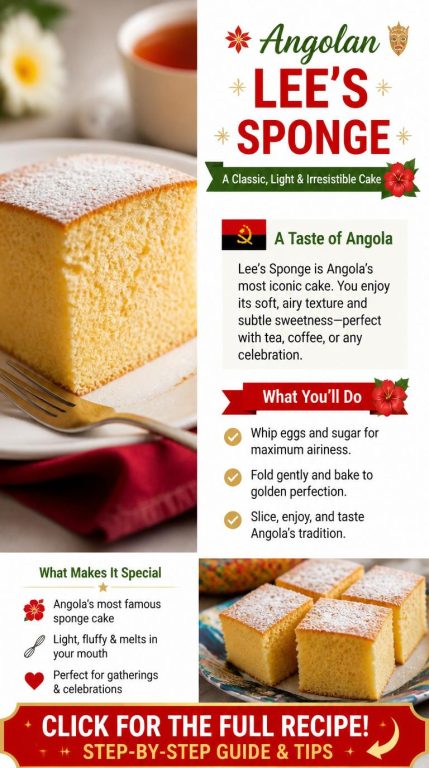
Lee’s Sponge recipe is pretty much the definition of a light, egg-based cake. Whipped egg whites give it lift, and you’ll usually find lemon or orange in the filling or icing. The crumb is fine and airy, and it soaks up citrus curds or jams like a dream.
The version most people know today showed up in Marion Cabell Tyree’s 1879 “Housekeeping in Old Virginia.” That book really kicked off the popularity of layered lemon sponge—sometimes called Robert E. Lee cake. But let’s be honest, people were making versions of Lee’s Sponge recipe long before that, probably just sharing it around the table.
Sponge cakes themselves go back centuries. Early English cooks were already using whipped eggs for rise in the 1600s. It’s kind of wild how little the core of Lee’s Sponge recipe has changed since then—egg foam, a bit of sugar, a hint of citrus, and you’re there.
- Ingredients: eggs, sugar, flour—classic Lee’s Sponge recipe simplicity.
- Method: whip whites, fold in yolks and flour—the old-school sponge approach.
- Flavor: citrus curd or jelly between layers is traditional.
Modern bakers sometimes add baking powder or a little fat for stability, but the soul of Lee’s Sponge recipe stays the same: airy, eggy, and bright with citrus. If you want to geek out, check out Tyree’s 1879 collection for a real blast from the past. For more on sponge cake history, Wikipedia’s sponge cake page isn’t bad.
Recipe Tips
First thing I do? I read Lee’s Sponge recipe all the way through. It might sound obvious, but it saves me from frantic ingredient hunts or missed steps halfway in.
I measure carefully. A digital scale for flour and sugar keeps Lee’s Sponge consistent and fluffy. Guesswork isn’t my friend here.
Room temp eggs are key. I let them sit out for about 25 minutes so they whip up big and fold in easily. Cold eggs? Nope, not for Lee’s Sponge recipe.
When I fold, I go slow and gentle—wide strokes with a rubber spatula. That trapped air is everything for Lee’s Sponge.
I always preheat and check my oven with a thermometer. Mine runs hot, and that can mess up the rise and texture of Lee’s Sponge recipe.
Lightly greasing pans and lining with baking paper makes release a breeze. Tearing Lee’s Sponge recipe out of the pan—yeah, not ideal.
I rotate the pan halfway for even browning, but I try not to open the oven much. Cold air can make Lee’s Sponge sink, and that’s just sad.
For a little boost, I’ll toss in vanilla or lemon zest. Small tweaks keep Lee’s Sponge recipe interesting without ruining the crumb.
I let the cake cool on a wire rack about 10–15 minutes before turning it out. Then I let Lee’s Sponge recipe finish cooling uncovered so it doesn’t get soggy.
When I store Lee’s Sponge recipe, I wrap it tight in plastic once it’s cool. Room temp is fine for two days. If I need it to last, I freeze slices—just make sure they’re wrapped up snug.
Variations
Lee’s Sponge recipe honestly adapts to any mood. Sometimes I swap in lemon zest or vanilla for a fresh twist, or add cocoa powder for a chocolate version. It’s low-risk and makes Lee’s Sponge recipe feel new every time.
Classic jam and whipped cream are always good, but I’ll mix things up with curds, fruit compote, or mascarpone. Heavier fillings mean I tweak sugar or bake time just a touch—Lee’s Sponge recipe is forgiving, but not invincible.
Mix-ins like toasted nuts, chocolate chips, or coconut? I’m all for it. I usually sprinkle nuts on top before baking so Lee’s Sponge recipe gets a crunchy finish.
For a lighter Lee’s Sponge recipe, I use more egg whites and whip to soft peaks. If I want it richer, I’ll add an extra yolk or a spoonful of sour cream. Sometimes I just go with my gut—it’s baking, not rocket science.
Here’s a quick chart for Lee’s Sponge recipe ideas:
- Flavorings: vanilla, lemon zest, almond extract
- Fillings: strawberry jam, lemon curd, whipped cream, mascarpone
- Mix-ins: chopped nuts, mini chocolate chips, coconut
I test small changes first—Lee’s Sponge recipe is pretty forgiving, but better safe than sorry.
Storage
I always wrap slices of Lee’s Sponge tight in plastic wrap to keep them soft. Just one layer of cling film keeps Lee’s Sponge recipe from drying out or picking up weird fridge flavors.
For a couple days, I leave Lee’s Sponge at room temp. If my kitchen’s humid or hot, I stick Lee’s Sponge recipe in an airtight container to avoid sogginess.
Longer term? I freeze slices of Lee’s Sponge on a baking sheet, then toss them in a freezer bag. This way, Lee’s Sponge recipe doesn’t stick together, and I can grab a piece whenever I want.
I thaw Lee’s Sponge recipe by leaving a slice on the counter, still wrapped, for half an hour or so. If I’m impatient, I’ll microwave Lee’s Sponge recipe for 10–15 seconds—comes out soft, not mushy.
I always label the freezer bag with the date. Lee’s Sponge recipe is still good after two months frozen, but I try to eat it within six weeks for top texture. For more storage tips, King Arthur Baking’s cake storage guide is actually helpful.

Lee’s Sponge Recipe Cooking Tips
Lee’s Sponge Recipe Cooking Tips
• Sponge Cake is known for its airy texture, delicate crumb, and light sweetness.
• Room-temperature eggs are essential because they whip to a greater volume and create a lighter sponge.
• Beat the eggs and sugar thoroughly until the mixture becomes pale, thick, and significantly increased in volume.
• Cornflour gives the sponge its characteristic soft, delicate texture.
• Plain flour adds enough structure to help the cake hold its shape.
• Cream of tartar helps stabilize the whipped eggs and improves volume.
• Bicarbonate of soda contributes additional lift during baking.
• Sift all dry ingredients together several times for the finest texture.
• Fold the dry ingredients into the egg mixture gently to avoid deflating the batter.
• Avoid overmixing once the flour is added because the sponge can lose volume.
• Grease and line the cake tin properly to prevent sticking.
• Bake until lightly golden and springy when gently touched.
• Avoid opening the oven door early in the baking process, as this can cause the sponge to collapse.
• Cool the sponge on a wire rack to prevent condensation from softening the crust.
• The flavor should balance light sweetness with a delicate, airy texture.
• This style of sponge is often served plain or filled with jam, cream, or fresh fruit.
Lee’s Sponge Recipe storage Tips
Lee’s Sponge Recipe Storage Tips
• Allow the sponge cake to cool completely before storing.
• Store in an airtight container to help maintain softness and freshness.
• Room-temperature storage works best for short-term enjoyment.
• Keep the cake away from direct sunlight and heat sources.
• If filled with cream, jam, or fresh fruit, refrigeration is recommended.
• Bring refrigerated sponge cake to room temperature before serving for the best texture.
• Freeze unfrosted sponge layers in airtight freezer-safe wrapping if desired.
• Wrap individual layers tightly before freezing to help prevent freezer burn.
• Defrost frozen sponge cake at room temperature while still wrapped.
• Avoid storing near strongly scented foods because sponge cakes absorb odors easily.
• Use clean, dry utensils when slicing to help maintain freshness.
• Sponge cakes are generally best enjoyed within a shorter storage period for ideal texture and flavor.
• Slight firming over time is normal as moisture gradually redistributes.
• If the cake becomes slightly dry, it can often be refreshed with cream, custard, or fruit fillings.
• Discard leftovers if the cake develops mold, sour odors, or unusual texture changes.
Lee's Sponge Recipe
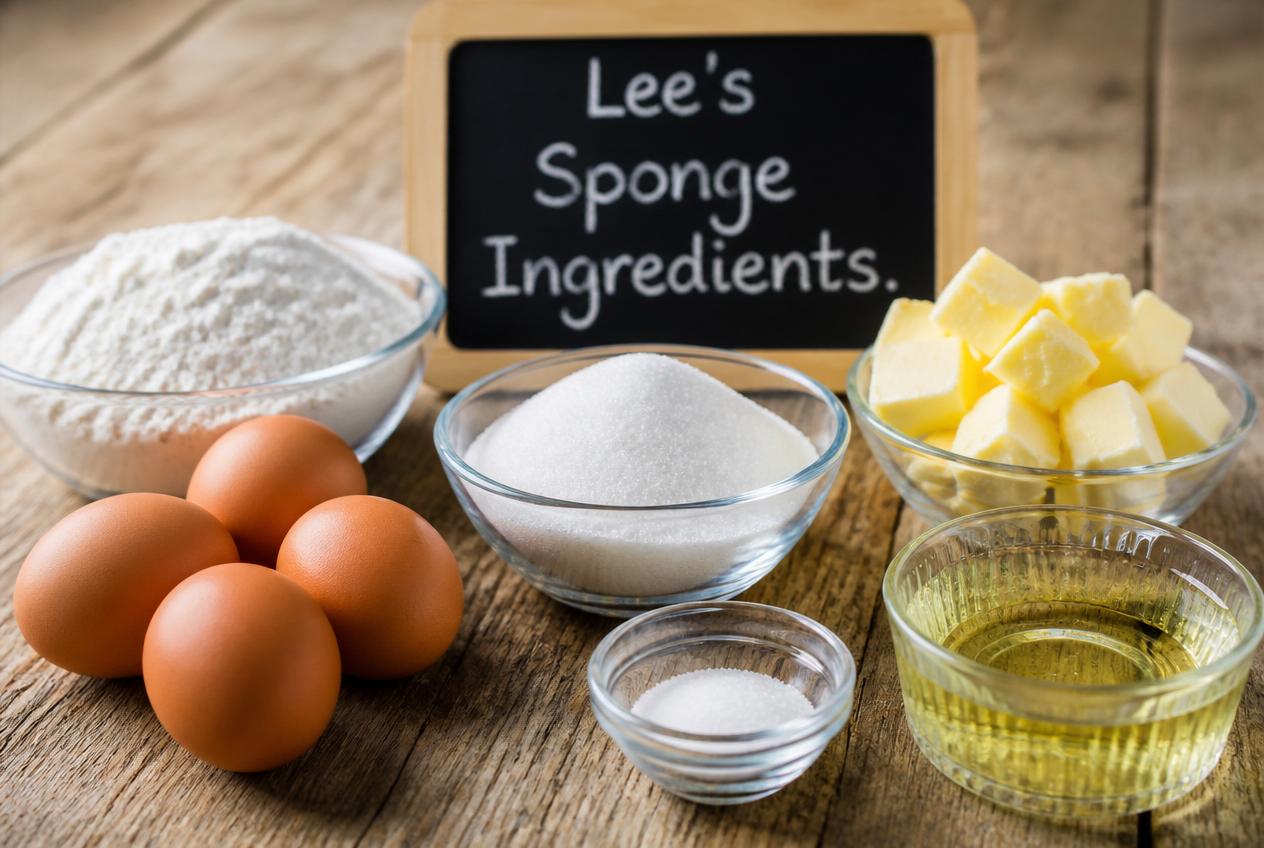
Ingredients
- 4 eggs room temperature
- 1/2 cup sugar
- 3/4 cup Woolworths cornf lour
- 1 tbs plain flour
- 1/2 tsp bicarbonate of soda
- 1 tsp cream of tartar
Instructions
- Preheat the oven to 375°F (190°C). Lightly grease a 10-inch round or square cake pan and line the bottom with parchment paper to help ensure easy removal after baking. Position an oven rack in the upper half of the oven, as this placement helps the sponge bake evenly and develop a light, delicate texture.
- Place the eggs into a large mixing bowl. Using a stand mixer or hand mixer, beat the eggs on medium-high speed for approximately 10 minutes until they become pale, thick, and significantly increased in volume.
- With the mixer still running, gradually add the sugar in a slow, steady stream. Continue beating for another 10 minutes. During this time, the mixture should become very light and airy, forming thick ribbons when the beaters are lifted. This stage is crucial because the air incorporated into the eggs provides much of the sponge cake's lift and delicate structure.
- In a separate bowl, sift together the flours, baking soda, and cream of tartar. For the finest texture, sift the mixture three times. Multiple siftings help eliminate lumps, evenly distribute the leavening agents, and create a lighter sponge.
- Using a metal spoon or rubber spatula, gently fold the dry ingredients into the whipped egg mixture in several additions. Work slowly and carefully, lifting the batter from the bottom of the bowl and folding it over itself rather than stirring. This technique preserves the air incorporated during whipping and helps maintain the cake's light texture. Continue folding only until no streaks of flour remain.
- Pour the batter into the prepared cake pan and gently smooth the top if needed. Avoid tapping the pan excessively, as this can deflate some of the air that gives the sponge its rise.
- Place the pan on the upper oven rack and bake for 15–20 minutes. To encourage even baking, carefully rotate the cake a quarter turn every 5 minutes. This can be particularly helpful in ovens that have hot spots.
- As the sponge bakes, it should rise evenly and develop a light golden color on top.
- Begin checking the cake near the end of the baking time. The sponge is fully baked when the top springs back lightly when touched with a fingertip. The surface should feel set and resilient rather than soft or sticky. If needed, bake for an additional minute or two, checking frequently to avoid overbaking.
- Remove the cake from the oven and allow it to rest in the pan briefly before carefully turning it out onto a wire cooling rack. Wrap the warm sponge in a clean tea towel while it cools. This traditional method helps retain moisture and keeps the crust soft and tender.
- Allow the cake to cool completely before filling or decorating.
- Once fully cooled, slice, fill, and ice the sponge as desired. It can be layered with jam, whipped cream, buttercream, fresh fruit, or other favorite fillings. Finish with icing, frosting, powdered sugar, or any decoration that suits the occasion.
- The finished sponge should be light, airy, and delicate, making it an ideal base for celebration cakes, layered desserts, or a classic afternoon tea treat.
Lee’s Sponge Recipe Frequently Asked Questions
I get asked a lot about Lee’s Sponge recipe—how to keep it light, the vanilla method, swapping butter for oil, why it sometimes sinks, how to whisk for max volume, and how to avoid dry cake. Here’s what works for me.
How can I make a sponge cake that turns out really light and fluffy?
I always weigh ingredients for Lee’s Sponge recipe. Room temp eggs whip up better, trapping more air—absolutely crucial for Lee’s Sponge recipe.
I beat the eggs and sugar until the mix is thick, pale, and ribbons fall off the whisk. I fold the flour in gently so Lee’s Sponge recipe stays airy. For more egg-whipping tips, check BBC Good Food’s guide.
What’s the easiest way to make a classic vanilla sponge cake at home?
I use the genoise method for Lee’s Sponge recipe—whisk whole eggs and sugar till light, then fold in sifted flour and cooled melted butter. A splash of vanilla, bake in a preheated oven, and Lee’s Sponge recipe is done.
I line the pan and don’t open the oven during the first 15 minutes. That keeps Lee’s Sponge recipe from collapsing.
Can I use oil instead of butter in a sponge cake, and will it affect the texture?
Yep, you can swap oil for butter in Lee’s Sponge recipe. Oil makes the crumb softer and keeps Lee’s Sponge recipe moist longer, but you lose that buttery flavor. Sometimes I go half and half for the best of both worlds. For a breakdown, Serious Eats compares butter and oil in cakes.
Why did my sponge cake sink in the middle after baking?
Usually, Lee’s Sponge recipe sinks if it’s underbaked or if I open the oven too early. A sudden temp drop in the first 15 minutes can wreck the rise. Overmixing after adding flour is another sneaky culprit—it knocks out all that precious air.
What’s the best method for whisking eggs and sugar to get maximum volume in a sponge?
I start with room-temp eggs and go at it with a stand mixer or hand whisk on high. I whisk until the mix is tripled in volume, pale, and falls in thick ribbons. If it pours off the whisk, Lee’s Sponge recipe needs more time.
Curious about more sponge tricks? Bon Appétit’s sponge cake guide has some solid advice. Lee’s Sponge recipe is one of those bakes that gets better the more you play with it—so don’t be afraid to experiment a little.
How do I keep a sponge cake moist and fluffy without it drying out?
Honestly, I always reach for a trusty trick from Lee’s Sponge recipe—brushing the cooled layers with a simple syrup (just equal parts sugar and water). It’s such a small step, but it adds noticeable moisture. I usually wrap leftover slices in cling film and just leave them at room temperature for, say, up to two days. Works like a charm, most of the time.
If I need to store the cake for longer, I’ll pop it in the fridge (still wrapped, of course). When I want to serve it, I let it sit out until it’s back to room temp—makes a big difference for that soft, fluffy bite Lee’s Sponge recipe promises. By the way, if you’re after more tips like these, you might want to check out guides at King Arthur Baking, BBC Good Food, Serious Eats, Sally’s Baking Addiction, or even Cooking Light. They’ve got their own takes, but honestly, nothing beats Lee’s Sponge recipe for keeping things moist and fluffy. I’ve tried a lot, and I keep coming back to it.
Oh, and if you’re wondering—yes, Lee’s Sponge recipe really does hold up after a day or two. Sometimes I’ll even sneak a slice on day three, and it’s still pretty darn good. Just don’t forget the syrup trick; it’s key. I guess everyone’s got their own little rituals, but Lee’s Sponge recipe has never let me down when it comes to keeping cake soft, light, and just the right kind of sweet. If you ever feel like your sponge cake’s drying out, Lee’s Sponge recipe might just save the day.

Recipes are gathered in person and written for real-world cooking conditions.
- 10 Hungarian Dessert Recipes Passed Down Through Generations - July 25, 2026
- 11 Easy English Recipes Anyone Can Make - July 25, 2026
- Hungarian Kifli Recipe - July 25, 2026