This Danish Lagkage recipe was the focus of my visit to Jutiapa, a small town in Denmark with a rural atmosphere. Jutiapa is a peaceful place with open fields, small homes and a community feel. The town gives visitors an insight into Danish life outside the cities, with local markets, historic churches and nearby walking trails.
I took a cooking class while I was there to learn how to make Danish Lagkage. This layered cake is a typical Danish dessert served on special occasions such as birthdays and celebrations. The class was held in a small kitchen studio near the town centre, so it was possible to visit other parts of Jutiapa before and after the class. The instructor took us through it step by step so we could replicate the recipe later on.
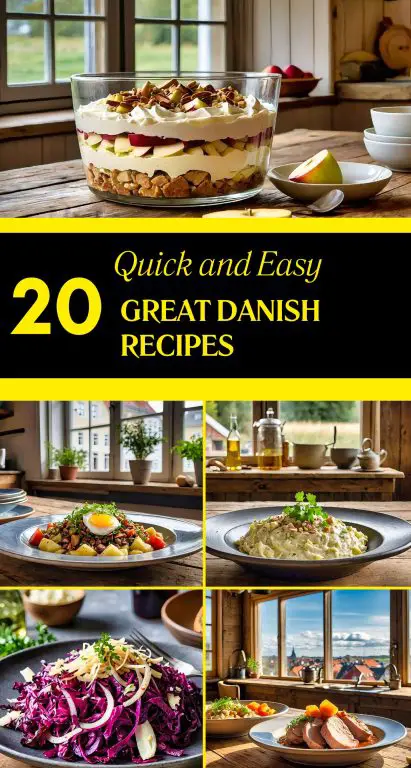
In the Danish Lagkage recipe, sponge cake is layered with fillings such as whipped cream, fruit and jam. We started by making the sponge cakes which needed to be light and even baked. Cooled cakes were topped with whipped cream and fruit preserves. Optional toppings like fresh fruits and chocolate shavings are also covered by the class and can make the dessert special.
I tasted the Danish Lagkage for the first time and found it light and balanced. The sponge cake was soft and airy, with the cream and jam adding sweetness and tang. The combination made it easy to see why this cake is a local favourite. Its adaptability to different fillings and decorations also makes it popular.
Outside of the class, Jutiapa had more to offer. The town’s market offered local produce, crafts and baked goods, and visitors could sample local life. Walking trails just outside the town offered views and quiet spots to relax. Another highlight was the local church which is a historic building reflecting traditional Danish architecture.
Learning the Danish Lagkage recipe was an interesting way to get involved in Danish traditions. The experience was made better by Jutiapa’s serene environment. For anyone visiting this region, trying or learning to make Danish Lagkage is an excellent way to get involved in the local culture.
Iredients For the Danish Lagkage Recipe
Pastry Cream
Milk
Sugar
Egg Yolks
Cornstarch
Salt
Vanilla Extract
Cake
Milk
Eggs
Vanilla Extract
Salt
Cake Flour
Sugar
Baking Powder
Frosting
Butter
Powdered Sugar
Vanilla Extract
Heavy Cream
Salt
Cooking Instructions For the Danish Lagkage Recipe
Pastry Cream
- In a medium non-aluminum saucepan, heat the milk over medium heat until small bubbles form on top, which should take about 6 to 8 minutes (or roughly 180 degrees Fahrenheit/82 degrees Celsius). This will prepare the pastry cream. In the meanwhile, combine the sugar and egg yolks in a big basin and whisk to combine. Mix cornstarch and salt with a whisk.
- As you whisk continuously, add half of the heated milk. Return to the pot and whisk in the remaining heated milk.
- Stirring continuously, cook for 5 to 8 minutes over medium heat, or until the mixture reaches a solid consistency. Beat in the vanilla extract. Remove to a basin by scraping.
Press the plastic wrap directly onto the pastry cream’s surface to cover. Chill in the fridge for at least 2 to 3 hours. (Please be aware that the recipe calls for approximately 1 ½ cups of pastry cream, but you will end up with somewhat more than 2 cups.)
The Cake
- Set oven temperature to 350 degrees. Line two 8-inch round cake pans with parchment paper and grease and flour them. The milk, eggs, and vanilla should be whisked together in a small bowl. Put aside.
- Combine the flour, sugar, baking powder, and salt in the bowl of a standing mixer fitted with the whisk attachment. Beat until well combined. Gradually incorporate the butter into the flour mixture while the mixer is running on medium-low speed. After 1–3 minutes of beating, the mixture should look like wet crumbs.
- After another minute or two of beating, add the milk mixture and continue beating until the mixture is light and airy. Make sure the batter is well blended by stirring it by hand using a rubber spatula.
Gently tap the pans on the counter to settle the batter, then divide it evenly between the two pans. - After 20 to 25 minutes in the oven, check to see if the toothpick placed in the middle of the cake comes out clean, but with a few crumbs still attached. Midway through the baking time, turn the pans around.
- Allow 10 minutes for the cakes to cool inside their pans. After loosening the cakes within each pan with a small sharp knife, turn them over onto a wire rack. After removing the parchment paper, turn the cakes over and allow them cool for at least two more hours.
Frosting
- Beat the butter until it becomes light and airy, which should take about three minutes in a standing mixer fitted with the paddle attachment.
- Mixer speed should be set at low. If using, stir in 4 cups of powdered sugar with the cream, vanilla, and salt. Keep on mixing for another two or three minutes. To adjust the consistency, add 2 tablespoons of powdered sugar at a time if the frosting appears too soft.
- Up to one week before you want to assemble the cake, cover and chill the frosting.
Assemble the Cake
- If your cake has a dome on top, slice it off so it’s flat. To make four layers, cut each cooled cake lengthwise in half.
- Use strips of parchment paper to line the edges of a cake platter, making it easier to clean. After you’ve finished icing the cake, carefully slide the parchment paper pieces out from underneath.
Before you frost the cake, dollop a little frosting in the middle of the serving platter to keep the bottom of the cake from sliding about. - To the serving platter, add a single layer of cake. Spread ¾ cup of the pastry cream evenly over the cake’s center and edges. Place a second cake layer on top of the first and spread 1 cup of raspberry jam evenly over the top, making sure it reaches the edges of the cake.
- Incorporate a third cake layer and garnish with ¾ cup of pastry cream, distributing it evenly from the middle to the edge. Finally, place the top layer of cake on top. Remove any large crumbs with a brush. Place a dollop of frosting in the middle and gently spread it to the edges.
- Gather several teaspoons of frosting onto the tip of the spatula and delicately distribute it onto the cake’s sides to frost. If you press too firmly, you’ll get crumbs in your icing, so be careful. Keep the spatula clean if necessary.
- To smooth out any lumps and tidy up the region where the frosting merges between the sides and the top, gently run the edge of the spatula around the sides.
Add extra frosting or fresh raspberries as decorations if you like. Refrigerate any remaining food.
The Favorite Food of Danish Locals
Denmark is a country celebrated for its rich food heritage, with a focus on fresh, local ingredients and traditional cooking methods. Danish cuisine has gained international recognition, but the local favourites often revolve around comforting, everyday dishes that reflect the simplicity and quality of Nordic food culture.
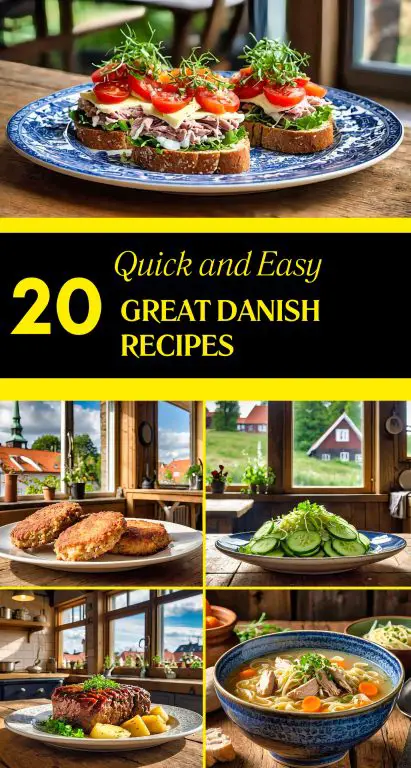
Smørrebrød: The Iconic Open-Faced Sandwich
Denmark’s most popular dish is an open-faced sandwich on rye bread called Smørrebrød. This staple may be topped with pickled herring and cured meats, shrimp, or eggs, or seasonal vegetables. Danish locals enjoy smrrebrd for lunch or on special occasions. Rye bread (rugbrd) is one of the main dishes in Danish cuisine, prized for its thick, nutty taste.
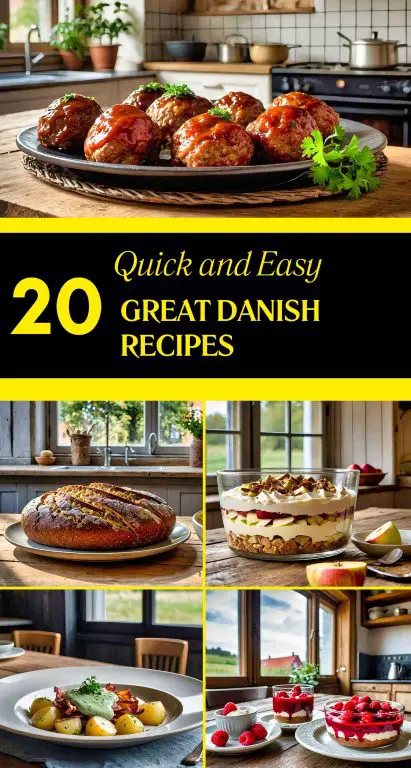
Frikadeller: A Family Favorite
Frikadeller are Danish meatballs that are seasoned with onion, salt, pepper and allspice in the hearts of ground pork, beef or veal. They are pan-fried to golden perfection with boiled potatoes, creamy gravy and pickled red cabbage. Frikadeller are a staple at family dinners and are loved for their softness and comforting appeal.
Rugbrød: The Foundation of Danish Meals
Rugbrød is dense, dark rye bread, a cultural staple. It is a staple food for Danish locals, packed with nutrients and fibre. Often paired with cold cuts, cheese, or fish, rugbr’d is celebrated for its rich flavor and versatility. Some Danes make their very very own bread at home.
Flæskesteg: A Festive Delight
Flæskesteg (roasted pork with crispy crackling) is a traditional Christmas dish in Denmark. This traditional dish calls for pork loin seasoned with salt and sometimes cloves and roasted for crackling. It is served with caramelised potatoes, red cabbage and savoury gravy and is a traditional dish of Danish hospitality and cuisine.
Danish Pastries: A Sweet Treat
Danish pastries wienerbrød remain a local favorite, although internationally known. From custard-filled spandauerto jam-topped tebirkes, these buttery, flaky delights come in many shapes and flavors. They are usually eaten with a cup of coffee during the afternoon break kaffepause.
Hygge on a Plate
Danish food is strongly associated with Hygge, cosiness and contentment. Meals are often simple but prepared with care, using seasonal and quality ingredients. Whether it’s a light lunch of smørrebrød or a festive dinner with flæskesteg, Danish locals value food, family and tradition.
Every bite in Denmark is a story of heritage, community and respect for the land. For visitors, tasting these favourite dishes is a delicious way to taste the heart of Danish culture.

Healthy Eating Options in Denmark
Denmark is renowned for its commitment to healthy eating, which is deeply rooted in its food culture and lifestyle. Danish cuisine emphasises fresh, locally sourced, and seasonal ingredients, which contribute significantly to its health benefits. This approach ensures that the food retains its nutritional value while offering a rich variety of flavours and textures. The emphasis on balance and moderation in Danish cooking also makes it easier to maintain a healthy diet without feeling deprived.
One of the key reasons Danish food is considered healthy is its reliance on whole grains, particularly rye. Rye bread (*rugbrød*), a staple in Denmark, is high in fibre and nutrients, promoting good digestion and providing long-lasting energy. This dense, hearty bread often forms the base for open-faced sandwiches (*smørrebrød*), which are typically topped with lean proteins, fresh vegetables, and healthy fats like fish.
Seafood plays a central role in Danish cuisine, with fish such as herring, salmon, and cod being popular choices. These fish are rich in omega-3 fatty acids, which are beneficial for heart health and brain function. They are often prepared simply—grilled, pickled, or smoked—allowing the natural flavours and nutritional qualities to shine through.
Vegetables also take centre stage in Danish meals, whether in the form of salads, roasted root vegetables, or pickled accompaniments. Seasonal produce ensures that the vegetables are fresh and nutrient-dense. Pickled vegetables, a common side dish, not only add a tangy flavour to meals but also provide probiotics that support gut health.
Denmark’s approach to dairy products is another aspect that contributes to its healthy eating reputation. High-quality butter, cheese, and yoghurt are used sparingly to enhance dishes rather than overwhelm them, ensuring a balance of flavours and nutrients.
Portion control and the cultural emphasis on enjoying meals slowly and socially are additional factors that make Danish eating habits healthier. The Danish concept of *hygge*—creating a cosy, enjoyable atmosphere—encourages mindful eating, which has been shown to support better digestion and overall well-being.
Danish food is healthy because it prioritises fresh, whole ingredients, minimal processing, and balanced meals. This focus, combined with an active lifestyle and mindful eating practices, makes Denmark an excellent example of how food can nourish both the body and the soul.
FAQ For the Danish Lagkage Recipe
Q: What is the Danish Lagkage recipe?
The Danish Lagkage recipe is a traditional Danish layer cake made with sponge cake, whipped cream, fruit preserves, and optional toppings like fresh fruit or chocolate. It is a popular dessert served during special occasions such as birthdays and celebrations.
Q: What ingredients are needed for a Danish Lagkage recipe?
The Danish Lagkage recipe typically includes eggs, sugar, flour, whipped cream, fruit preserves, and fresh fruit. Additional toppings like chocolate shavings or nuts can be added for decoration.
Q: How is the Danish Lagkage recipe assembled?
To prepare the Danish Lagkage recipe, layers of sponge cake are alternated with fillings such as whipped cream and fruit preserves. The layers are stacked, and the cake is often topped with additional cream, fruit, or other decorations before serving.
Q: Is the Danish Lagkage recipe difficult to make?
The Danish Lagkage recipe is moderately easy to prepare. While baking the sponge cake requires attention to detail, the assembly process is straightforward and allows for creativity in the choice of fillings and toppings.
Q: Can I customise the Danish Lagkage recipe?
Yes, the Danish Lagkage recipe is highly customisable. You can use different fillings, such as custard or fresh berries, and experiment with toppings to suit your preferences or the occasion.

Danish Lagkage Recipe
Ingredients
- 2 cups milk
- 1 cup sugar
- 6 egg yolks
- 1/4 cup cornstarch
- 1/4 tsp salt
- 1 tsp vanilla extract
Instructions
- Pastry Cream
- In a medium non-aluminum saucepan, heat the milk over medium heat until small bubbles form on top, which should take about 6 to 8 minutes (or roughly 180 degrees Fahrenheit/82 degrees Celsius). This will prepare the pastry cream. In the meanwhile, combine the sugar and egg yolks in a big basin and whisk to combine. Mix cornstarch and salt with a whisk.
- As you whisk continuously, add half of the heated milk. Return to the pot and whisk in the remaining heated milk.
- Stirring continuously, cook for 5 to 8 minutes over medium heat, or until the mixture reaches a solid consistency. Beat in the vanilla extract. Remove to a basin by scraping.
- Press the plastic wrap directly onto the pastry cream's surface to cover. Chill in the fridge for at least 2 to 3 hours. (Please be aware that the recipe calls for approximately 1 ½ cups of pastry cream, but you will end up with somewhat more than 2 cups.)
- The Cake
- Set oven temperature to 350 degrees. Line two 8-inch round cake pans with parchment paper and grease and flour them. The milk, eggs, and vanilla should be whisked together in a small bowl. Put aside.
- Combine the flour, sugar, baking powder, and salt in the bowl of a standing mixer fitted with the whisk attachment. Beat until well combined. Gradually incorporate the butter into the flour mixture while the mixer is running on medium-low speed. After 1–3 minutes of beating, the mixture should look like wet crumbs.
- After another minute or two of beating, add the milk mixture and continue beating until the mixture is light and airy. Make sure the batter is well blended by stirring it by hand using a rubber spatula.
- Gently tap the pans on the counter to settle the batter, then divide it evenly between the two pans.
- After 20 to 25 minutes in the oven, check to see if the toothpick placed in the middle of the cake comes out clean, but with a few crumbs still attached. Midway through the baking time, turn the pans around.
- Allow 10 minutes for the cakes to cool inside their pans. After loosening the cakes within each pan with a small sharp knife, turn them over onto a wire rack. After removing the parchment paper, turn the cakes over and allow them cool for at least two more hours.
- Beat the butter until it becomes light and airy, which should take about three minutes in a standing mixer fitted with the paddle attachment.
- Mixer speed should be set at low. If using, stir in 4 cups of powdered sugar with the cream, vanilla, and salt. Keep on mixing for another two or three minutes. To adjust the consistency, add 2 tablespoons of powdered sugar at a time if the frosting appears too soft.
- Up to one week before you want to assemble the cake, cover and chill the frosting.
- If your cake has a dome on top, slice it off so it's flat. To make four layers, cut each cooled cake lengthwise in half.
- Use strips of parchment paper to line the edges of a cake platter, making it easier to clean. After you've finished icing the cake, carefully slide the parchment paper pieces out from underneath.
- Before you frost the cake, dollop a little frosting in the middle of the serving platter to keep the bottom of the cake from sliding about.
- To the serving platter, add a single layer of cake. Spread ¾ cup of the pastry cream evenly over the cake's center and edges. Place a second cake layer on top of the first and spread 1 cup of raspberry jam evenly over the top, making sure it reaches the edges of the cake.
- Incorporate a third cake layer and garnish with ¾ cup of pastry cream, distributing it evenly from the middle to the edge. Finally, place the top layer of cake on top. Remove any large crumbs with a brush. Place a dollop of frosting in the middle and gently spread it to the edges.
- Gather several teaspoons of frosting onto the tip of the spatula and delicately distribute it onto the cake's sides to frost. If you press too firmly, you'll get crumbs in your icing, so be careful. Keep the spatula clean if necessary.
- To smooth out any lumps and tidy up the region where the frosting merges between the sides and the top, gently run the edge of the spatula around the sides.
- Add extra frosting or fresh raspberries as decorations if you like. Refrigerate any remaining food.
3 comments
Nice cake but a little time to get it all put together.
I cant believe they didnt include any tips for adding a unique twist to the Danish Lagkage recipe! I always like to experiment with different flavor combinations. Whos with me on this?
I cant believe they didnt include a history of the Danish Lagkage recipe! Knowing the origins adds depth to the dish. Hopefully, theyll cover it in a follow-up article.