
Most people don’t expect a savory cheese balls with meat to contain seasoned meat, but in Curaçao, I’ve found this unique blend is a staple at family gatherings. In this recipe, I guide you through crafting the authentic version I learned from local cooks, so you can bring bold island flavors to your kitchen with confidence.

Cheese Balls With Meat Recipe from Curacao
The Dutch-Caribbean Culinary Collision
Every bite of a cheese ball with meat tells a story of migration, adaptation, and flavor. I’ve watched generations in Willemstad shape this snack into something uniquely theirs, blending Dutch cheese-making traditions with Caribbean spices and rhythms. You can taste the influence of colonial trade in the use of Edam, yet the filling-spiced ground beef, cumin, and pickled onions-speaks directly to local taste.
The history of the hollowed-out cheese
Creating hollowed-out cheese balls began as a clever way to stretch ingredients during lean times. I learned from older vendors that the technique allowed families to transform a simple wheel of cheese into multiple servings. You’d scoop out the center, stuff it with whatever protein was available, and fry it until golden.
Why the street snack reigns supreme in Willemstad
Walking through Punda, you’ll see people of all ages holding paper cones filled with warm cheese balls with meat. I’ve noticed how their crisp exterior gives way to molten cheese and savory meat, creating a contrast that keeps customers coming back. The snack fits perfectly into the city’s fast-paced street life.
Street food thrives here because it’s accessible, affordable, and full of flavor. I’ve spoken with vendors who’ve sold these cheese balls for over thirty years, and they’ll tell you the same thing: people don’t just buy them for hunger-they buy them for comfort, for memory, for a taste of home. You can feel that connection in every bite.
Cheese Balls With Meat Recipe from Curacao Key Takeaways:
- Cheese balls with meat from Curaçao combine a savory spiced beef filling with a soft, cheesy dough that’s rolled into balls and deep-fried to golden perfection.
- The dish reflects Curaçao’s rich cultural blend, merging African, Dutch, and Caribbean flavors in a single handheld snack.
- Ground beef is typically sautéed with onions, bell peppers, garlic, and seasonings like cumin and tomato paste to create a deeply flavored filling.
- Each cheese ball encases a small chunk of Edam or Gouda cheese, which melts slightly when fried, creating a creamy center.
- The outer dough is often made from mashed potatoes or a simple flour-based mixture, giving the balls a tender yet slightly crisp texture.
- Cheese balls with meat are commonly served as appetizers or party food, often accompanied by tangy dipping sauces like tamarind or peanut sauce.
- While traditionally fried, some modern versions bake the balls for a lighter alternative without sacrificing much flavor.
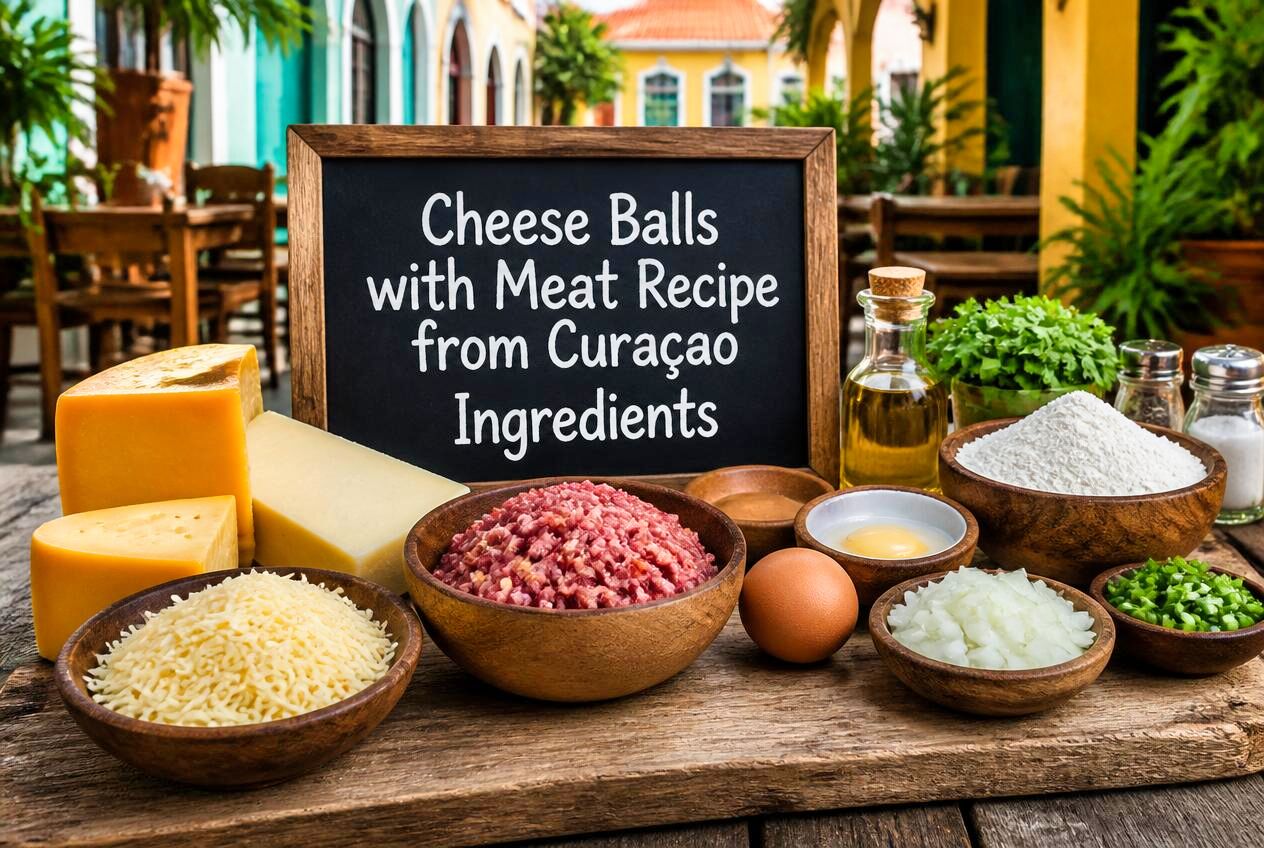
The Cheese Balls With Meat Recipe Essential Ingredient Profile
I always stress the importance of quality when building flavor in traditional Curacao cheese balls with meat. Each ingredient carries weight, and substitutions can shift the character of the dish entirely. For a true taste of authenticity, you’ll want to source the right components with care-especially the cheese and dried beef. Speaking of which, if you’re intrigued by the idea of a Dried Beef Cheese Ball, it’s worth exploring how salt-cured meats can deepen the savory profile.
Selecting the proper aged Edam or Gouda
You need a firm, mature Edam or Gouda that holds its shape when rolled and fried. I look for wheels aged at least 12 months-these develop a nutty depth without becoming overly sharp. Younger cheeses melt too quickly and lack the structural integrity required for frying. The right aged cheese binds well with the meat mixture and offers a subtle resistance when bitten into, enhancing the overall texture.
The salty-sweet balance of raisins and capers
Salt and sweetness play off each other beautifully in this cheese balls with meat recipe. I use a small handful of plump raisins and briny capers to cut through the richness of the beef and cheese. Their contrast isn’t overwhelming-just enough to spark your taste buds with every bite. Getting this balance right transforms the cheese balls from simple snacks to something memorable.
What surprises most people is how well these seemingly opposing flavors harmonize. I’ve found that golden raisins add a gentler sweetness, while green capers bring a brighter tang. When folded into the mixture, they distribute evenly, ensuring each cheese ball carries that signature Curacao flair-complex, balanced, and deeply satisfying.
Preparing the Savory Meat Filling
I start building depth in the meat filling by slow-braising the base protein-usually shredded chicken, beef, or goat-until it yields easily to a fork. You’ll want to simmer it gently in water or broth with bay leaves and onions to extract maximum flavor. This step ensures the meat absorbs the island’s soul, becoming tender enough to meld seamlessly into the cheese shell later. For a trusted reference on traditional methods, check out The Hirshon Curaçao Filled Cheese Shell – Keshi Yena.
Slow-braising the base protein
Braising takes time, but patience rewards you with rich, pull-apart texture. I use a heavy pot and low heat, letting the meat cook for at least two hours. You can skim fat occasionally, but don’t rush it-this is where the foundation gains character. The liquid reduces naturally, concentrating flavor without needing extra seasoning too soon.
Infusing the sofrito and island spices
Once the meat is tender, I sauté a fresh sofrito of onions, bell peppers, tomatoes, and culantro. This aromatic base wakes up the dish with color and scent. I stir in cumin, allspice, and a touch of clove-spices that echo Curaçao’s colonial past. These flavors marry with the meat, transforming it into something deeply savory and unmistakably Caribbean.
What makes this step special is how the spices bloom in oil, releasing their crucial oils just before they hit the meat. You’ll notice the kitchen filling with warmth, a sign the sofrito is ready. I always taste and adjust here-your version should reflect your palate while honoring tradition.

The Architecture of the Deep-Fried Ball
I’ve spent years perfecting the structure of the Curacaoan kaasbal, and it all comes down to balance. Kaasbal (cheese balls, bolitas de queso) is Curacao’s answer to handheld comfort-crispy outside, rich inside, with a surprise at the center. You can’t rush this process; each layer has a role, and skipping steps ruins the harmony of textures.
Encasing the meat in a molten cheese shell
My cheese balls with meat secret starts with cold, firm cheese wrapped tightly around seasoned ground meat. You need a cheese that melts slowly but fully, like Edam or Gouda. When fried, it forms a gooey barrier that locks in juices while protecting the meat from drying out. I always chill the assembled balls before breading-this keeps the cheese from leaking too soon.
Mastering the triple-dredge breading technique
One dip isn’t enough. I coat each ball in flour, then egg wash, then breadcrumbs-twice in egg and crumbs for extra crunch. You’ll notice the difference immediately: a golden, shatter-crisp crust that doesn’t fall apart. This method seals in flavor and creates a satisfying contrast with the soft interior.
What makes the triple-dredge work is timing. I let the coated balls rest for 10 minutes before frying. This helps the layers bond, so the breading stays put when you bite in. Use fine, dry breadcrumbs for even coverage, and fry in oil at 350°F for the perfect golden finish.
The Heat and the Heart of the Side
Every bite of this Curacao cheese balls with meat carries more than flavor-it tells a story of island fire and homegrown pride. I’ve learned that the true soul of the dish lives in its accompaniments, especially the ones that bring heat. You can’t truly experience these meat-stuffed cheese balls without the bold kick that only a proper pika sauce delivers. It’s not just about spice; it’s about balance, tradition, and the way a simple condiment can transform a meal into memory.
Crafting a proper Pika onion sauce
I start with finely sliced red onions marinated in vinegar, just like my aunt taught me. The sharp tang cuts through the richness of the cheese and meat, awakening your taste buds. A generous pour of local hot sauce-usually one made from Madame Jeanette peppers-adds the right kind of fire. You’ll want to let it sit for at least an hour so the flavors deepen. This version isn’t just heat for heat’s sake; it’s layered, bright, and important.
Pairing with the local spirit of the island
I always reach for a chilled shot of Curaçao’s iconic blue liqueur or a crisp local beer when serving these cheese balls. The citrusy sweetness of the liqueur balances the savory, spicy notes, while a cold beer cools the burn just enough. You don’t need anything fancy-just something honest and island-made. It’s the kind of pairing that feels natural, like the breeze off the Caribbean Sea.
Your table will feel more authentic with a bottle of aged Curaçao rum on display. I prefer one with a hint of orange peel and oak, something that echoes the island’s colonial past and citrus groves. Sipping it slowly alongside the cheese balls creates a rhythm-spice, salt, sweetness-that mirrors the island’s culinary heartbeat. This isn’t just a drink; it’s part of the experience.
Cultural Significance of the Cheese Balls With Meat Recipe
From colonial scraps to culinary treasure
What began as a way to stretch leftovers into something satisfying now defines a national palate. Enslaved workers once repurposed Dutch cheese rinds and surplus meats into hearty meals, turning scarcity into flavor. I see this resilience in every bite of keshi yena-cheese balls with meat that carry generations of adaptation. You taste history, not just ingredients.
The shared experience of the island snack bar
Walking into a roadside *funchi* stand, you’ll often find keshi yena warming under a glass lid. Locals gather here not just to eat, but to connect. I’ve shared laughter and stories over these golden, oozing cheese balls in ways that transcend language. They’re more than food-they’re invitations to belong.
These snack bars operate as informal community hubs, where fishermen, students, and elders exchange news between bites. I’ve noticed how the rhythm of daily life slows just enough for a quick chat and a warm plate. Your presence alone becomes part of the tradition-no formalities, just shared moments shaped by flavor and familiarity. That’s where keshi yena truly lives.
To wrap up, I’ve shared a traditional Cheese Balls With Meat recipe from Curaçao that reflects the island’s rich blend of flavors and cultural influences. I encourage you to try making these at home, as they offer a delicious way to experience authentic Caribbean home cooking. You’ll find the balance of savory meat and creamy cheese inside a lightly fried shell both satisfying and unique. Your palate will appreciate the care and simplicity in each bite.

Cheese Balls With Meat Recipe from Curacao Cooking Tips
Cheese Balls with Meat Recipe from Curaçao Cooking Tips
• Cheese Balls with Meat are a popular snack and party food in Curaçao, combining savory seasoned meat with rich cheese in a crispy golden coating.
• Ground beef is commonly used, though pork, chicken, or mixed meats can also be incorporated.
• Finely season the meat with onions, garlic, and Caribbean herbs for maximum flavor.
• Cook the meat mixture completely before assembling the cheese balls.
• Allow the meat filling to cool before combining with cheese or shaping.
• Semi-firm cheeses that melt well are often preferred for a creamy interior.
• Edam and Gouda cheeses are especially popular due to Curaçao’s Dutch culinary influences.
• Grate or finely dice the cheese to ensure even distribution.
• Avoid using excessive moisture in the filling, which can make shaping difficult.
• Chill the mixture before forming balls if it becomes too soft.
• Shape the balls evenly to ensure consistent cooking.
• Coat the balls in flour, beaten egg, and breadcrumbs for a crisp exterior.
• Double-coating with breadcrumbs can provide extra crunch.
• Chill the coated balls briefly before frying to help maintain their shape.
• Fry in hot oil until golden brown and crisp.
• Avoid overcrowding the fryer or pan, which can lower the oil temperature.
• Drain on paper towels to remove excess oil.
• Properly prepared cheese balls should have a crunchy exterior with a hot, cheesy, flavorful center.
• Serve hot with dipping sauces, spicy condiments, or fresh garnishes.
Cheese Balls With Meat Recipe from Curacao Storage Tips
Cheese Balls with Meat Storage Tips
• Allow the cheese balls to cool before transferring them into storage containers.
• Store refrigerated in airtight containers to preserve freshness.
• Place parchment paper between layers if stacking multiple cheese balls.
• Refrigeration may slightly soften the crispy coating.
• Reheat in an oven or air fryer to help restore crispness.
• Avoid excessive microwave reheating, which can make the coating soft.
• Store dipping sauces separately until serving.
• Unfried coated cheese balls can often be refrigerated before cooking.
• Individual portions can be stored for convenient snacks or meals.
• Freeze cooked or uncooked cheese balls in airtight freezer-safe containers if desired.
• Arrange in a single layer initially when freezing to prevent sticking.
• Wrap tightly to help prevent freezer burn and preserve quality.
• Defrost frozen cooked cheese balls in the refrigerator before reheating.
• Frozen uncooked cheese balls can often be fried directly from frozen with adjusted cooking time.
• Use clean utensils when handling leftovers to help maintain freshness.
• Keep away from strongly scented foods because cheese readily absorbs surrounding odors.
• Check for signs of spoilage such as sour odors, mold, unusual discoloration, or texture deterioration before consuming leftovers.
• For best quality, enjoy the cheese balls while the coating remains crisp and the filling remains rich and flavorful.
Cheese Balls With Meat Recipe from Curacao
Ingredients
- 8 oz ground beef or your choice of meat
- 3 eggs
- 1 teaspoon baking powder
- 1 lb dutch or gouda cheese. Matured belegen is prefered.
- 1/4 teaspoon white pepper
- 1/2 cup all purpose flour
- Oil for frying
Instructions
- Pour the egg mixture over the shredded cheese.
- Mix thoroughly until the cheese is evenly coated.
- Add the black pepper and continue stirring to distribute the seasoning throughout the mixture.
- Gradually add the flour a little at a time, mixing after each addition.
- Continue adding flour until the mixture becomes firm enough to hold its shape when rolled into balls.
- The exact amount of flour may vary depending on the moisture content of the cheese and the size of the eggs.
- The finished mixture should be soft but easy to handle.
- Lightly dust your hands with flour to prevent sticking.
- Scoop small portions of the mixture and roll them into balls approximately 1½ to 2 inches in diameter.
- Avoid making them too large, as smaller cheese balls cook more evenly and develop a better texture.
- Place the shaped balls on a tray or plate while you prepare the oil.
- Pour enough oil into a deep skillet, saucepan, or fryer to allow the cheese balls to cook evenly.
- Heat the oil until it reaches frying temperature, approximately 350°F (175°C).
- Carefully place the cheese balls into the hot oil, working in batches to avoid overcrowding.
- Fry until they become evenly golden brown on all sides.
- Turn or gently move them around during cooking to ensure even browning.
- The cheese balls should develop a crisp exterior while remaining soft and cheesy inside.
- Using a slotted spoon, carefully remove the cheese balls from the oil.
- Transfer them to a plate lined with paper towels to absorb any excess oil.
- Allow them to cool slightly before serving.
- Arrange the cheese balls on a serving platter.
- Serve warm as an appetizer, snack, or party finger food.
- They can be enjoyed on their own or paired with dipping sauces such as marinara, ranch dressing, garlic aioli, spicy mustard, or a favorite hot sauce.
- For gatherings, insert toothpicks into each cheese ball for easy serving.
- These crispy cheese balls are a simple yet satisfying appetizer featuring a golden, crunchy exterior and a rich, cheesy center. Easy to prepare and perfect for parties, game days, or casual gatherings, they're always a crowd-pleaser.
Cheese Balls With Meat Recipe Frequently Asked Questions
Q: What are Cheese Balls With Meat from Curaçao?
A: cheese balls with meat recipes, known locally as “Bolinchi di Queso kon Karu,” are a traditional Curaçaoan appetizer or snack made with a mixture of spiced ground beef, breadcrumbs, and cheese, then rolled into balls and deep-fried until golden. These savory treats combine Dutch and Caribbean influences, reflecting the island’s diverse culinary heritage. They are often served during family gatherings, holidays, or as party finger food.
Q: What type of cheese is typically used in this cheese balls with meat recipe?
A: Edam cheese is the most commonly used cheese in authentic cheese balls with meatfrom Curaçao. This semi-hard Dutch cheese has a mild, slightly nutty flavor and holds its shape well when heated, making it ideal for frying. Some home cooks may substitute with mild Gouda or even processed cheese for a creamier texture, but traditional recipes favor Edam for its cultural and flavor authenticity.
Q: Can I bake the cheese balls with meat instead of frying them?
A: Yes, you can bake the cheese balls with meat recipe for a lighter version. Preheat the oven to 375°F (190°C), place the assembled balls on a greased baking sheet, and bake for 20-25 minutes, turning halfway through, until golden and crisp. Baking reduces oil absorption but may result in a less crunchy exterior compared to deep-frying. For extra crispiness, lightly spray the balls with oil before baking.
Q: What spices are typically used in the meat filling?
A: The cheese balls with meat recipe filling usually includes onions, garlic, tomato paste, Worcestershire sauce, cumin, black pepper, and sometimes a touch of chili or hot sauce for heat. These ingredients are sautéed until fragrant and well combined, creating a rich, savory base that complements the mild cheese. Fresh cilantro or parsley may be added for brightness before mixing with breadcrumbs to bind the filling.
Q: How should I store and reheat leftover cheese balls with meat recipes?
A: Store leftover cheese balls with meat recipes in an airtight container in the refrigerator for up to 3 days. To reheat, place them in a 350°F (175°C) oven for 10-12 minutes or until heated through and crisp on the outside. Microwaving is not recommended, as it can make the exterior soggy. For longer storage, freeze the cooked balls on a tray before transferring to a freezer bag; reheat directly from frozen in the oven for 15-20 minutes.

Recipes are gathered in person and written for real-world cooking conditions.
- Cheese Balls With Meat Recipe from Curacao - June 20, 2026
- Dutch Meatballs Recipe from Curacao - June 20, 2026
- Cashew Cake Recipe from Curacao - June 20, 2026