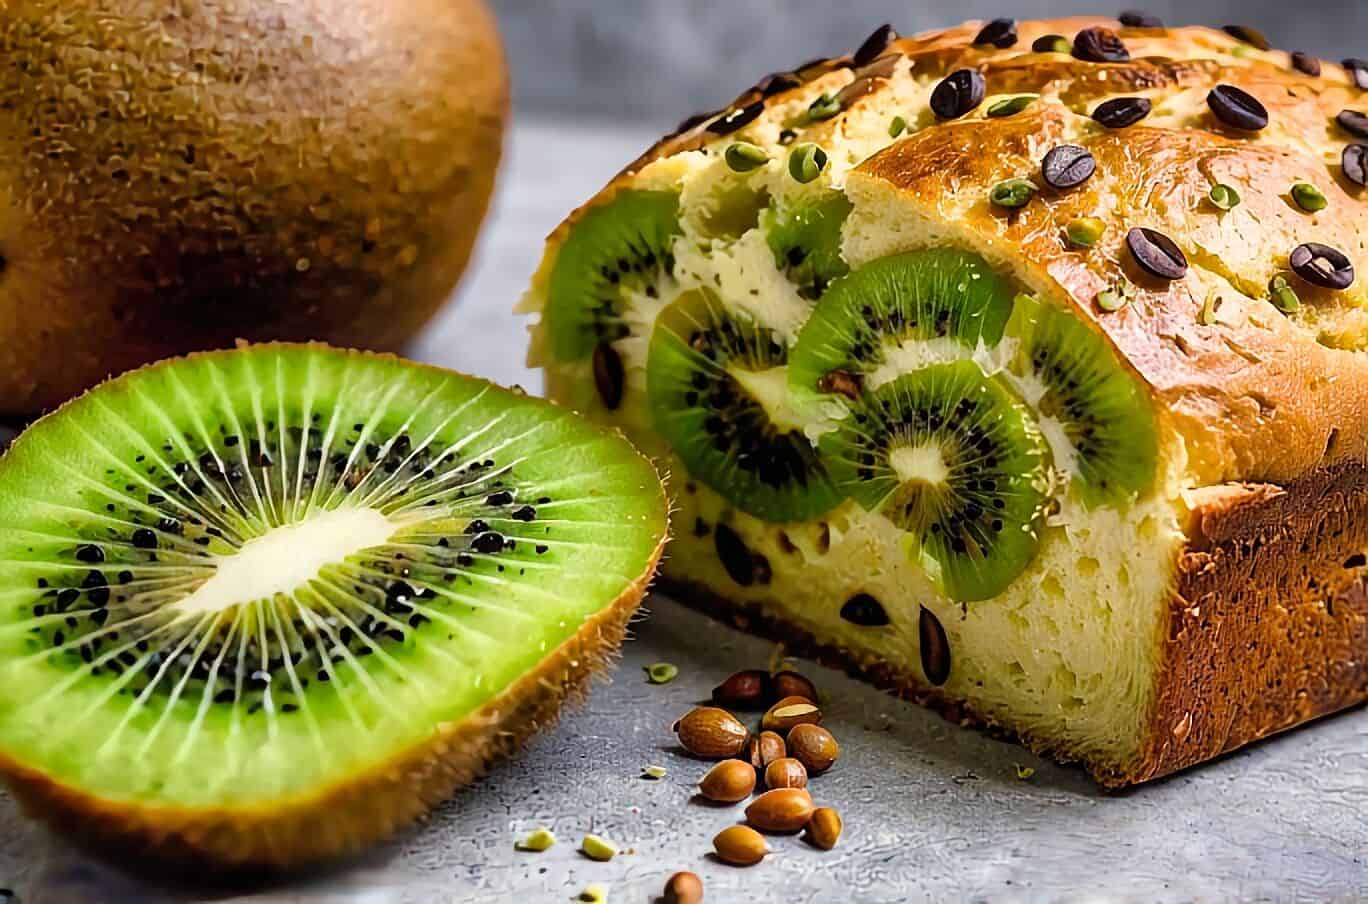
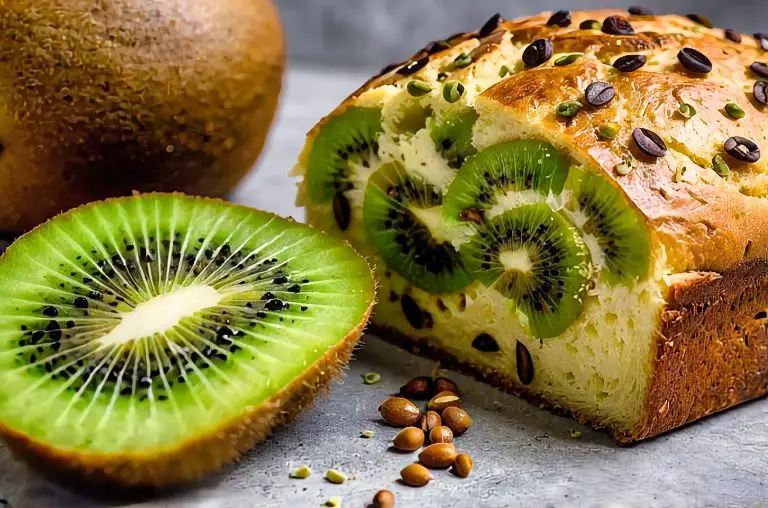
I learned about the New Zealand Kiwi Bread Recipe in a cooking classthat introduced me to a delightful treat. This unique recipe combines the sweet and tangy flavor of fresh kiwi with a moist, fluffy texture that makes it stand out. The experience of learning to bake it while surrounded by stunning landscapes made it even more special.
As we mixed the ingredients and shared stories, I discovered just how versatile Kiwi Bread can be. It serves as a perfect breakfast item or a charming addition to any brunch spread. I couldn’t wait to try making it at home and share the recipe with friends and family.
In this post, I will guide you through the steps to whip up this delicious Kiwi Bread, so you can bring a taste of New Zealand into your kitchen. Whether you’re an experienced baker or just starting out, this recipe is approachable and rewarding.

Preparation
Getting the right ingredients, utensils, and preparing the kiwi fruit properly is crucial for making a delicious Kiwi Bread. Here’s what you need to know to set yourself up for success.
Choosing the Right Ingredients
I always start with fresh, ripe kiwis. They should be slightly soft to the touch, indicating they’re ready for baking.
Here’s a list of essential ingredients:
- All-Purpose Flour: Provides the structure for the bread.
- Gluten-Free Flour: A great option for those with dietary restrictions.
- Milk: Adds moisture and richness to the mix.
- Vegetable Oil: Keeps the bread soft.
- Butter: Enhances the flavor.
- Sugar: Balances the tartness of the kiwi.
- Large Egg: Acts as a binding agent.
Using fresh ingredients will enhance the taste and texture of my bread.
Required Baking Utensils
Having the right tools makes the baking process smoother. Here’s what I keep on hand:
- Loaf Pan: A standard 9×5 inch pan works well for this recipe.
- Mixing Bowls: Preferably a couple of medium-sized ones for wet and dry ingredients.
- Measuring Cups and Spoons: Accurate measurements are key.
- Whisk: Great for beating eggs and mixing dry ingredients.
I find that good quality utensils help in achieving a consistent bake every time.
Preparing the Kiwi Fruit
Preparing the kiwi is simple, yet important. I wash the kiwis thoroughly under cold water.
Next, I slice off both ends and use a spoon to scoop out the flesh. It’s best to chop the kiwi into small pieces so it blends well into the bread.
The ripeness of the kiwi influences the flavor; riper fruit adds more sweetness to the bread. I also like to reserve a few slices for garnish on top before baking.
These steps ensure my Kiwi Bread is flavorful and visually appealing.
The Recipe Process
My experience with making Kiwi Bread involved several key techniques and tips that ensure a delicious outcome. The process focuses on the balance of mixing ingredients, achieving the right texture, and knowing how to cool and serve the bread effectively.
Mixing and Baking Techniques
To start, I gather all the ingredients: flour, baking powder, baking soda, sugar, eggs, and, of course, mashed kiwi. I mix the dry ingredients together first. This includes flour, baking powder, and baking soda.
Next, I beat the eggs and add them to the mixture, along with the mashed kiwi. When combining the wet and dry ingredients, I aim for a light and fluffy texture. It’s essential not to overmix, as this can lead to a tough loaf. I pour the batter into a greased loaf pan and bake it at 350°F (175°C) for about 45 minutes.
Creating the Perfect Texture
Achieving the right texture is crucial for Kiwi Bread. The key is to use the right amount of leavening agents. Baking powder and baking soda play important roles. They help the bread rise and create air pockets, giving the bread its light structure.
Additionally, using ripe kiwis makes a significant difference. They should be soft and juicy, enhancing both flavor and moisture. I often check for doneness by inserting a toothpick into the center; it should come out clean if the bread is ready.
Cooling and Serving Suggestions
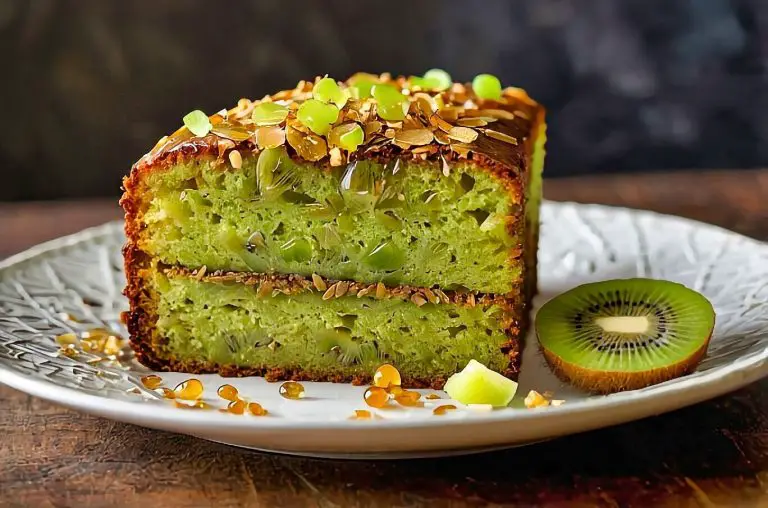
After baking, I let the Kiwi Bread cool in the pan for about 10 minutes. This step makes it easier to remove without breaking. I then transfer it to a wire rack to cool completely, ensuring the crust remains nice and crisp.
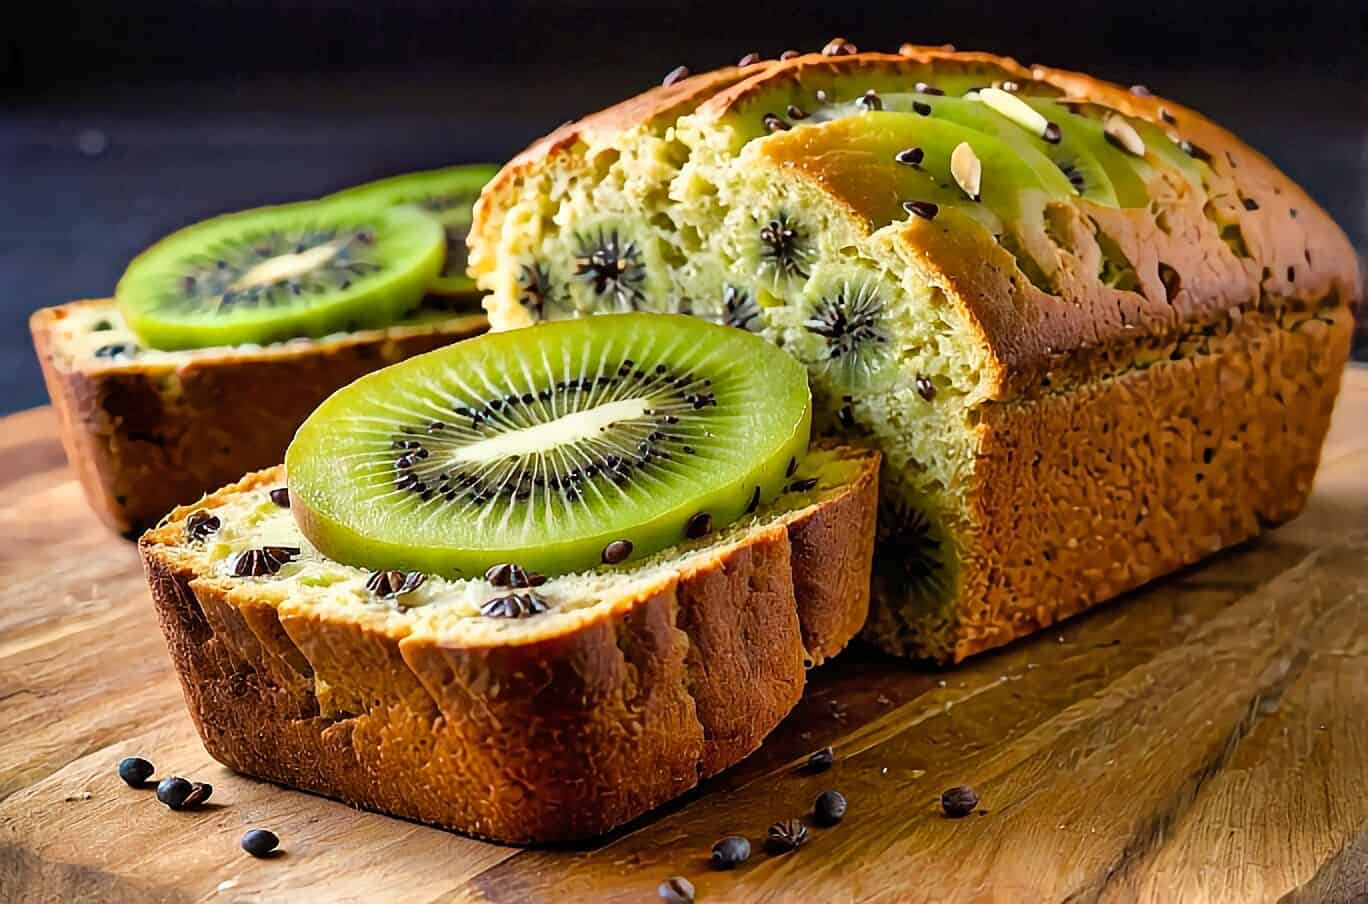
For serving, I enjoy slicing the bread while it’s still warm. It pairs wonderfully with butter or cream cheese. A sprinkle of powdered sugar on top adds a nice touch, making it visually appealing as well.
Customization and Substitutions
There are many ways to customize the Kiwi Bread recipe to suit different dietary needs and taste preferences. Here are some options for making it your own.
Gluten-Free Options
To make the Kiwi Bread gluten-free, I recommend using a gluten-free flour blend. Look for a mix that includes xanthan gum, which helps mimic the texture of wheat flour. You can also experiment with almond flour or coconut flour if you prefer a different flavor profile.
When using alternative flours, be mindful of the liquid content. Gluten-free flours often require adjustments to ensure the batter remains moist. Adding a bit more milk or yogurt can help achieve the right consistency.
Alternative Sweeteners
If you want to reduce sugar, there are several alternatives to consider. I often replace regular sugar with brown sugar for a richer flavor. Honey is another excellent option, offering natural sweetness and moisture.
For a low-calorie option, consider using stevia or erythritol. These sweeteners can vary in sweetness, so start with a small amount and adjust to taste. Remember, each sweetener may slightly alter the bread’s texture, so it’s a good idea to experiment.
Vegetarian and Vegan Variations
Making the Kiwi Bread vegetarian is straightforward. Simply use butter substitutes like margarine or coconut oil in place of butter.
For a vegan version, substitute eggs with flaxseed meal or chia seeds. Mix one tablespoon of flaxseed meal or chia seeds with three tablespoons of water and let it sit for a few minutes to gel. This mixture serves as an excellent binding agent.
Furthermore, opt for plant-based milk, like almond or oat milk, to keep the recipe vegan-friendly. This ensures that everyone can enjoy this delightful bread without compromising their dietary choices.
Health Benefits and Nutritional Information
Kiwi bread offers a range of health benefits thanks to its nutritious ingredients. Packed with essential vitamins, minerals, and dietary fiber, it makes for a wholesome addition to meals, especially breakfast.
Key Vitamins and Minerals
This delectable bread is rich in Vitamin C, which supports immune function and skin health. Each slice can provide a good portion of the daily requirement for this vitamin, thanks to the kiwi fruit.
The presence of potassium is another advantage. It helps regulate blood pressure and supports proper muscle function. Additionally, the combination of fruits and whole grains promotes dietary fiber, aiding digestion and keeping me feeling full longer.
The fiber content can also assist in maintaining healthy cholesterol levels. This makes kiwi bread a smart choice when looking for a tasty yet health-conscious option.
Incorporating Kiwi Bread into a Balanced Diet
Incorporating kiwi bread into my meals is simple and enjoyable. It pairs well with a variety of toppings. I love spreading a bit of almond butter or cream cheese for added flavor and nutrition.
For breakfast, I often enjoy it with fresh fruits or a sprinkle of chia seeds for an extra nutritional boost. This not only enhances the taste but also adds more fiber and healthy fats.
Remember, moderation is key. While kiwi bread is nutritious, it’s important to enjoy it as part of a varied diet. This ensures I get a wide range of nutrients to support my health.
Ingredients For the New Zealand Kiwi Bread Recipe
Kiwi
Brown Sugar
Lemon
Lemon Juice
Egg
Butter
All-purpose Flour
Salt
Baking Powder
Baking Soda
Powdered Sugar

Cooking Instructions For the New Zealand Kiwi Bread Recipe
Peel the skins off the kiwi using a potato peeler or paring knife. Chop enough fruit to make 1½ cups and place it in a 2-quart saucepan. Add sugar and lemon zest, then bring the mixture to a boil over medium-high heat. Reduce the heat and simmer for 5 minutes, stirring until the fruit softens and loses some color (it will turn yellowish). Remove the saucepan from the heat and set it aside to cool.
Meanwhile, melt the butter in the microwave (about 20 seconds) in a large bowl, stirring until fully melted (if needed, add 5-second intervals). Be sure the butter is only melted, not too hot, to prevent scrambling the egg when added. Whisk in the egg.
In a separate medium bowl, whisk together the flour, baking powder, and salt.
Once the kiwi mixture has cooled, sprinkle the baking soda over it and stir until bubbles form. Add this mixture to the butter and egg blend, stirring well. Ensure the kiwi mixture has cooled enough, as hot kiwi can cook or scramble the egg.
Gently mix the flour mixture into the wet ingredients, being careful not to overmix to avoid tough bread.
Transfer the mixture into a well-greased loaf pan or a 9×9-inch square baking dish, either greased or lined with parchment paper. Bake at 350˚F (177˚C) for 45-55 minutes. Check for doneness by inserting a toothpick or dried spaghetti noodle into the center; it should come out clean when done.
Let the bread cool in the pan for about 30 minutes before turning it out onto a wire rack. If using a greased pan, run a sharp knife along the edges to loosen the bread.
While the bread cools, prepare the icing by whisking powdered sugar and lemon juice in a small bowl. Start with 1 tablespoon of lemon juice and add more as needed to achieve a consistency that’s thick enough to harden on the bread but thin enough to drizzle. Spoon the icing over the loaf and garnish with extra kiwi slices if desired. To speed up the icing hardening, place the bread in the refrigerator for about 20 minutes. Slice and serve.
FAQ For the Traditional New Zealand Kiwi Bread Recipe
Question: What ingredients are needed for a Traditional New Zealand Kiwi Bread recipe?
A: A Traditional New Zealand Kiwi Bread recipe typically includes ripe kiwi fruit, flour, sugar, eggs, butter, baking powder, baking soda, and a pinch of salt. Some variations add cinnamon or nuts for extra texture and flavor.
Question: How do you prepare the kiwi fruit for a Traditional New Zealand Kiwi Bread recipe?
A: To prepare the kiwi fruit for a Traditional New Zealand Kiwi Bread recipe, peel and mash the kiwis until smooth. The mashed kiwi adds moisture and a mild sweetness to the bread, enhancing its texture.
Question: Can you make a gluten-free version of a Traditional New Zealand Kiwi Bread recipe?
A: Yes, a Traditional New Zealand Kiwi Bread recipe can be made gluten-free by substituting all-purpose flour with a gluten-free blend. Ensure that baking powder and other ingredients are also gluten-free for the best results.
Question: How should you store a Traditional New Zealand Kiwi Bread recipe?
A: A Traditional New Zealand Kiwi Bread recipe should be stored in an airtight container at room temperature for up to three days. For longer storage, refrigerate it for up to a week or freeze slices for later use.
Question: What pairs well with a Traditional New Zealand Kiwi Bread recipe?
A: A Traditional New Zealand Kiwi Bread recipe pairs well with butter, honey, or cream cheese. It also complements a cup of tea or coffee, making it a great breakfast or snack option.
New Zealand Kiwi Bread Recipe
Ingredients
- 6 Kiwi medium ripe chopped
- 1 cup Brown Sugar packed light or dark
- 1 Lemon 1 tsp lemon zest
- 1 ½ tbsp Lemon Juice
- 1 large Egg
- ½ cup Butter melted
- 1½ cups All-purpose Flour
- ½ tsp Salt
- ½ tsp Baking Powder
- ½ tsp Baking Soda
- 1 cup Powdered Sugar
Instructions
- Peel the skins off the kiwi using a potato peeler or paring knife. Chop enough fruit to make 1½ cups and place it in a 2-quart saucepan. Add sugar and lemon zest, then bring the mixture to a boil over medium-high heat. Reduce the heat and simmer for 5 minutes, stirring until the fruit softens and loses some color (it will turn yellowish). Remove the saucepan from the heat and set it aside to cool.
- Meanwhile, melt the butter in the microwave (about 20 seconds) in a large bowl, stirring until fully melted (if needed, add 5-second intervals). Be sure the butter is only melted, not too hot, to prevent scrambling the egg when added. Whisk in the egg.
- In a separate medium bowl, whisk together the flour, baking powder, and salt.
- Once the kiwi mixture has cooled, sprinkle the baking soda over it and stir until bubbles form. Add this mixture to the butter and egg blend, stirring well. Ensure the kiwi mixture has cooled enough, as hot kiwi can cook or scramble the egg.
- Gently mix the flour mixture into the wet ingredients, being careful not to overmix to avoid tough bread.
- Transfer the mixture into a well-greased loaf pan or a 9×9-inch square baking dish, either greased or lined with parchment paper. Bake at 350˚F (177˚C) for 45-55 minutes. Check for doneness by inserting a toothpick or dried spaghetti noodle into the center; it should come out clean when done.
- Let the bread cool in the pan for about 30 minutes before turning it out onto a wire rack. If using a greased pan, run a sharp knife along the edges to loosen the bread.
- While the bread cools, prepare the icing by whisking powdered sugar and lemon juice in a small bowl. Start with 1 tablespoon of lemon juice and add more as needed to achieve a consistency that's thick enough to harden on the bread but thin enough to drizzle. Spoon the icing over the loaf and garnish with extra kiwi slices if desired. To speed up the icing hardening, place the bread in the refrigerator for about 20 minutes. Slice and serve.
4 comments
Never had Kiwi much but the bread turned out well and I am going to find other uses for this wonderful fruit.
I never knew kiwi bread was a thing! Im all for trying new recipes, but using kiwi fruit in bread sounds bizarre. Has anyone actually tried this? Im curious about the taste!
Im not sure about using kiwi in bread. Sounds interesting, but will it taste good? Im all for trying new things, but this one has me skeptical. What do you guys think?
I never knew you could make bread with kiwi fruit! Seems like an interesting twist on a classic recipe. I wonder how the tangy flavor of the kiwi blends with the bread. Would you try it?